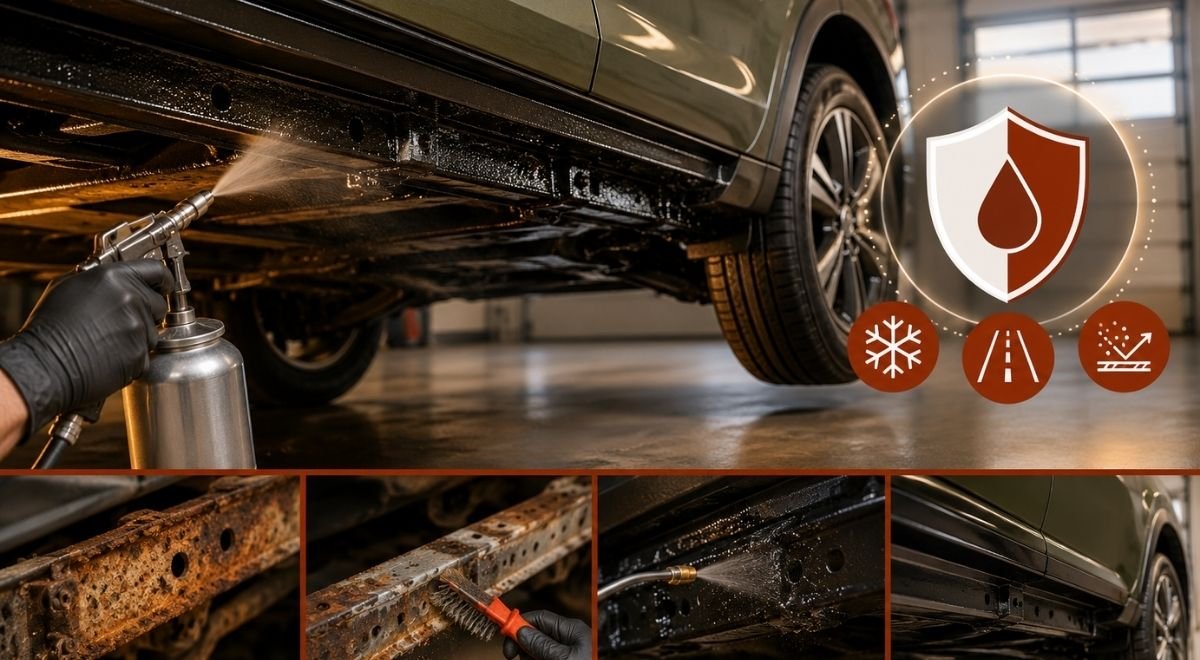
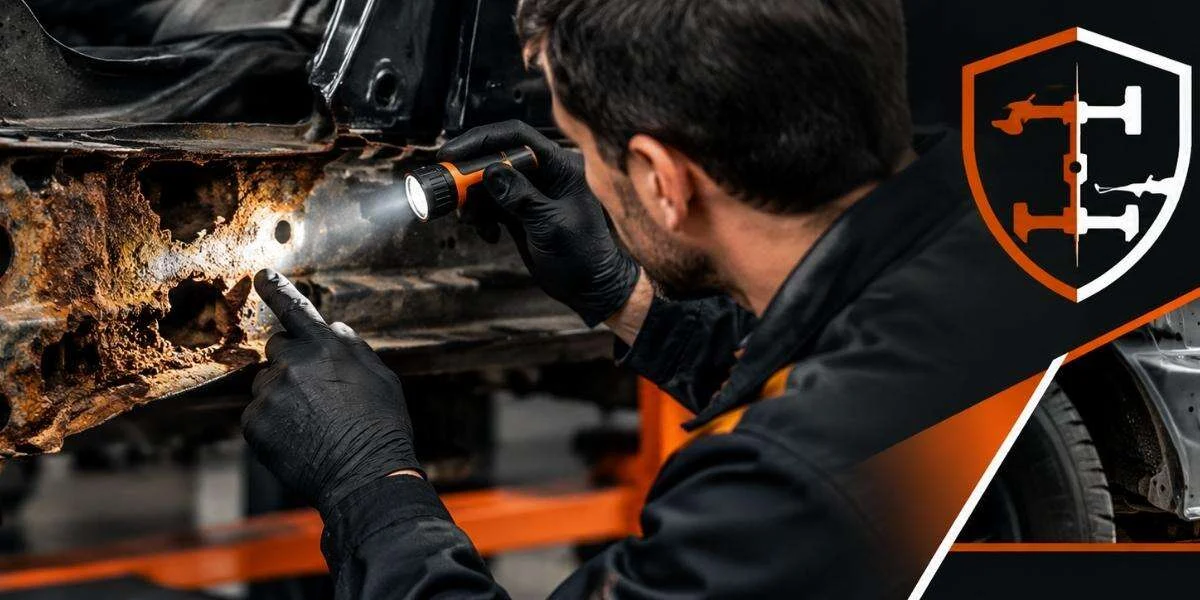
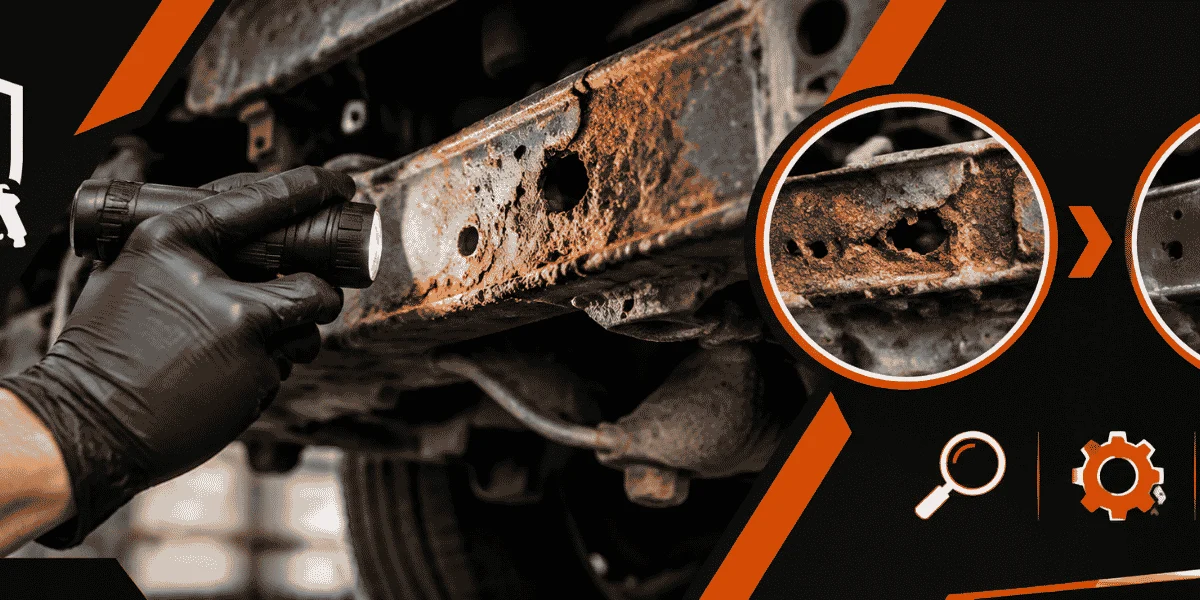
Rust prevention on cars works best as a sequence of decisions, not as a single product sprayed underneath a dirty vehicle. For a Central Massachusetts owner, the practical outcome is a vehicle with cleaner drain paths, documented corrosion, repaired metal where necessary, and a coating plan suited to how the car is used. This guide shows you how to inspect a daily driver, new truck, leased vehicle, classic, or fleet unit; decide whether washing, cavity protection, undercoating, or structural repair belongs first; and build a maintenance interval that responds to actual salt exposure.
Road salt is not merely a cosmetic nuisance. It helps water remain electrically conductive on metal surfaces, allowing corrosion cells to continue operating after a roadway looks dry. The Federal Highway Administration describes chloride-based deicers as a source of corrosion affecting vehicles, bridges, and other infrastructure; its technical discussion is a useful reminder that salt residue plus moisture is the working mechanism, not winter weather by itself. See the FHWA discussion of corrosion and deicing materials at FHWA’s winter maintenance research page.
Define the vehicle’s exposure before choosing protection
Start by recording how the vehicle encounters water, salt, mud, and trapped debris. A garage-kept collector that moves on dry weekends needs a different plan from a pickup used on untreated back roads, and both differ from a leased crossover parked outdoors beside a treated highway.
Classify the use, not just the age
Age is a poor substitute for exposure. A three-year-old truck that plows or tows in winter may have a higher corrosion burden than a fifteen-year-old summer-only car. Note the following:
- Winter mileage and route: highway commuting, rural roads, hilly roads, and treated parking lots leave different deposits.
- Storage conditions: heated garages can dry a vehicle quickly, but repeated warm-and-wet cycles may move salty moisture into seams before drying.
- Water access: a vehicle that can be rinsed after storms is easier to manage than one parked where the underside cannot be reached.
- Use pattern: plowing, towing, off-road driving, short trips, and fleet idling all change the places where mud and brine collect.
- Vehicle construction: boxed frames, overlapping seams, pinch welds, rocker panels, brake and fuel-line clips, and enclosed cavities deserve separate attention.
For a fleet, make the unit’s route and duty cycle part of the record. A municipal pickup, delivery van, and landscape trailer may all operate in the same county while collecting contamination in different areas. For a used-car buyer, ask for service records and inspect the underside rather than treating a clean-looking exterior as evidence of protection.
| Vehicle situation | Primary risk | First protection decision | Signal to change the plan |
|---|---|---|---|
| New daily driver or lease | Unprotected seams and cavities exposed before visible rust | Inspect lift points, drains, and factory coatings before applying anything | Early bubbling, damaged coating, or blocked drains |
| Older commuter | Existing scale concealed under dirt or old coating | Clean and map corrosion before selecting a coating | Probe failure, flaking scale, wet cavities, or line damage |
| Truck, plow, or work fleet | Heavy salt, mud packing, impact, and repeated wet cycles | Combine frequent rinsing with documented inspections | Route changes, winter duty, or recurring deposits in the same area |
| Classic or specialty vehicle | Irreplaceable original metal and hidden restoration damage | Use controlled cleaning and preserve repair evidence | New staining, seam movement, or corrosion returning beside a repair |
The table is a planning artifact, not a universal schedule. As an illustrative starting policy, a high-salt daily driver might receive an underside inspection at the beginning and end of winter, while a summer-only vehicle might be checked before storage and before its first spring outing. Adjust that policy when route exposure, visible residue, recurring wetness, or a new work assignment shows the vehicle is receiving more contamination than expected.
Inspect and document corrosion before cleaning or coating
Do not begin by covering the darkest area with a thick black material. First determine whether you are looking at surface oxidation, layered scale, perforation, a damaged seam, or a structural member that has lost useful section. Coating is not a substitute for metal assessment.
Use a repeatable inspection route
Inspect from the front of the vehicle toward the rear, then repeat the route on the opposite side. Use a bright inspection light, camera, plastic scraper, and a suitable lift or safe access method. Never rely on a jack alone when working underneath a vehicle.
- Inspect front and rear frame sections, crossmembers, suspension mounts, and body-to-frame attachment points.
- Look behind splash shields, inside wheel arches, around pinch welds, and at rocker-panel ends.
- Check brake and fuel lines, retaining clips, fasteners, and wiring brackets for corrosion or abrasion.
- Find drain holes in doors, rockers, tailgates, boxed sections, and other cavities; note whether they are open.
- Look for cracked factory coating, swollen seams, flaking scale, bubbling paint, and a sharp boundary between clean and rusted metal.
- Photograph each problem from a wide view and a close view, using the same orientation when you repeat the inspection.
Lightly tapping questionable scale with an appropriate inspection tool can reveal loose material, but aggressive hammering can damage thin sheet metal or obscure the original condition. If the metal flexes, flakes through, or has a soft perforated area near a suspension or body mount, stop treating it as a cosmetic project.
For safety-related defects, check whether the vehicle has an applicable recall using the official NHTSA recall lookup. A recall search does not certify the condition of an individual frame, and it does not replace an in-person inspection, but it can identify manufacturer campaigns that should be handled through the appropriate repair channel.
Separate cosmetic rust from structural risk
Surface discoloration on a replaceable bracket is not the same decision as layered corrosion at a suspension attachment. A useful triage is:
- Monitor: intact metal with light oxidation and no swelling, perforation, or movement.
- Prepare and protect: sound metal with removable scale, provided drains and seams can be cleaned and dried.
- Repair first: perforation, severe section loss, cracked mounts, distorted members, or corrosion at a load path.
- Refer for a second assessment: uncertain geometry, previous structural repairs, or a vehicle where originality and safety requirements conflict.
For a used-car buyer, pay particular attention to repairs that hide transitions: a fresh coating ending abruptly, a welded patch without clear surrounding preparation, or scale trapped beneath an older layer. A seller’s claim that a vehicle is “undercoated” tells you little unless you can identify what was cleaned, what was repaired, and whether inspection access remains.
Wash away salt without driving contamination deeper
Cleaning is the first active corrosion-control step because it removes the electrolyte and exposes the surface you need to evaluate. It is also where owners can create trouble by using force in the wrong place. Rinsing removes contamination; it does not repair rust.
Use water strategically
After a salty commute, concentrate on wheel wells, suspension pockets, frame ledges, rocker-panel ends, and the lower edges of body panels. A low-pressure rinse that reaches the underside is generally more useful than repeatedly blasting one seam from inches away. Avoid directing water into electrical connectors, damaged seals, or open cavities with enough force to pack grit farther inside.
As an illustrative starting policy, rinse the underside after a major salting event or several winter trips, then adjust based on visible residue, mud accumulation, and whether the vehicle dries promptly. More frequent rinsing may be justified for a plow truck or a vehicle that repeatedly drives through brine; less frequent rinsing may be reasonable for a dry-stored summer vehicle. The signal to change is not the calendar alone—it is salt remaining in pockets after the vehicle has dried.
- Choose a location where wash water and loosened debris can be handled responsibly.
- Rinse from multiple angles instead of forcing a narrow jet into seams.
- Give wheel wells and frame shelves enough time for deposits to soften.
- Allow the vehicle to drain and dry before inspection, coating, or storage.
- Do not seal wet mud, salt, or solvent residue beneath a protective material.
For businesses and restoration shops, separate cleaning from production scheduling. A vehicle that arrives wet and heavily contaminated may need time for drainage, drying, and a second inspection. Compressing those steps can produce a neat-looking job while leaving salt or moisture under the coating.
Know when washing is not enough
Old undercoating can become a sponge-like layer that holds grit against the metal. Flaking scale may conceal a hole. Grease and oil may prevent a protective film from bonding or staying in the intended area. If the surface cannot be made inspectable, stop adding material and plan for mechanical cleaning, abrasive work, or localized removal.
Use environmental controls appropriate to the work. The OSHA abrasive blasting safety guidance addresses hazards including dust, abrasive media, noise, and respiratory exposure. That matters for a frame-off project because the correct question is not only “Will blasting remove the rust?” but also “Can the shop contain the debris, protect workers, and preserve parts that should not be blasted?”
Choose preparation and repair based on the metal’s condition
Preparation should create a sound, inspectable surface without removing useful metal or damaging adjacent components. There is no single best method for every vehicle. Wire wheels, scrapers, needle scalers, media blasting, chemical treatment, and panel replacement each have a place, along with limitations.
Match the method to the part
- Light surface oxidation: clean, abrade, and verify that the metal is sound before protection.
- Layered scale: remove loose material mechanically, then inspect the remaining section instead of assuming the dark surface is solid.
- Contaminated old coating: strip or clean enough area to determine whether the coating is bonded and whether corrosion is active beneath it.
- Complex frame or component: consider controlled blasting after removing or shielding sensitive parts and establishing debris control.
- Perforated or structurally weakened metal: repair or replace the affected section before applying corrosion protection.
Abrasive blasting can expose the truth quickly, but it can also warp thin panels, remove markings, damage seals, and drive media into cavities or bearings. On a classic frame, document shim locations, bracket orientation, drain paths, and original details before disassembly. On a modern vehicle, protect sensors, harnesses, brake components, and sealing surfaces from media and overspray.
Bay State Rust Prevention’s frame-off rust removal service is relevant when the frame or major components must be separated, cleaned, assessed, and restored rather than simply sprayed in place. That approach is more involved, but it creates access to areas that remain hidden during an ordinary underside application.
Repair load-bearing metal before sealing it
Structural repair requires a competent assessment of section loss, geometry, weld access, and the manufacturer’s repair constraints. Do not use filler, thick coating, or a cosmetic patch to bridge a weakened suspension mount. The repair must restore the part’s intended function and preserve drainage and inspection access.
For a worked example, consider a ten-year-old pickup used for a 35-mile winter commute and occasional trailer work. The owner sees rust on the frame and requests a heavy coating. Inspection shows:
- light oxidation on the front frame rails;
- packed salt and mud on the rear crossmember;
- flaking scale near one spring-hanger area;
- sound brake lines but corroded retaining clips; and
- open drain holes on one rocker, blocked holes on the other.
The correct sequence is not “spray everything.” The shop should clear and inspect the drains, remove the loose scale near the spring hanger, determine whether the hanger and surrounding frame retain sound metal, replace or repair compromised clips as appropriate, clean and dry the frame, then select protection for the accessible sound surfaces and cavities. The rear crossmember may need more preparation than the front rails. The coating decision follows the inspection, not the other way around.
Select a protection system that fits the surface and the owner’s maintenance ability
Corrosion protection has several jobs: isolate metal from water and salts, remain in the intended location, tolerate ordinary movement and temperature changes, and leave enough access for future inspection. A hard film, a waxy cavity product, a paint system, and a corrosion-inhibiting oil are not interchangeable.
Think in zones
| Zone | What the protection must address | Common mistake | Maintenance question |
|---|---|---|---|
| Exposed frame and brackets | Clean, sound metal and impact-prone surfaces | Covering loose scale or wet residue | Can the surface still be inspected for new scale? |
| Boxed frame sections | Internal seams, condensation, and limited access | Coating only the outside | Are access points and drains open? |
| Doors, rockers, and cavities | Waxy film reaching seams without blocking drainage | Filling a cavity without confirming its exits | Can moisture drain after application? |
| Wheel wells and splash areas | Salt impact, mud, and stone strikes | Applying over loose factory coating | Will washing or impacts remove the film? |
| Brake, exhaust, and moving components | Clearance and material compatibility | Overspray on friction or hot surfaces | Are no-spray boundaries marked? |
WaxOyl is the corrosion-protection material used by Bay State Rust Prevention, but the material still depends on preparation, coverage, and access. The useful decision is where a protective film belongs and where it does not. Keep drains open and friction surfaces clean; never treat brake rotors, pads, tires, exhaust components, belts, or electrical connectors as ordinary coating targets.
For a new truck or leased vehicle, the objective may be preventive access and documentation rather than restoration. Photograph the underside before and after service, retain the work description, and schedule a later inspection. For a classic, the objective may include preserving original finishes and avoiding an irreversible heavy coating on areas that will later be displayed or detailed.
As an illustrative starting policy, review a coated daily driver twice per year and after any collision, deep off-road impact, or major suspension work. Adjust the interval when the film visibly thins, mud repeatedly accumulates, a wash no longer removes deposits, or new oxidation appears beside a repaired area. The right interval is the one that catches damage before it becomes inaccessible—not a promise that one application lasts forever.
Verify the work and build a maintenance loop
Good rust prevention ends with a record that tells the next person what was done and what still needs watching. This is especially important for leased vehicles, fleets, used-car transactions, and restoration projects where several shops may work on the same asset.
Create a handoff record
- Record the vehicle identification, mileage, date, and exposure category.
- Save before-and-after photographs with identifiable locations.
- List corrosion that was monitored, repaired, removed, or left inaccessible.
- Document drain holes, cavities, no-spray zones, and parts removed or shielded.
- Note the product or system used and the surfaces intentionally excluded.
- Set the next inspection trigger and identify who is responsible for it.
For a fleet, use one inspection sheet per vehicle and a summary showing repeat defects by location. If every truck returns with salt packed behind the same shield, the response may be a wash-process change, shield adjustment, or inspection detail rather than more coating. If one vehicle shows corrosion after a body repair, review that repair’s seam sealing and drainage before treating the whole fleet identically.
Use condition signals instead of calendar promises
Inspect sooner when:
- the vehicle has been in a collision or driven through deep water;
- a suspension, exhaust, fuel, or brake component has been replaced;
- a coating is peeling, cracking, or separating from its substrate;
- new bubbling or orange staining appears around a seam;
- mud remains trapped after washing and drying; or
- a drain hole is blocked or a cavity remains damp.
During washing and inspection, do not mistake a clean exterior for a clean underside. Salt can remain in overlaps, clips, and boxed sections after the visible body dries. Conversely, do not assume every stain requires aggressive stripping; sound metal with stable, documented protection may only need cleaning and monitoring.
Disposal also belongs in the plan. If cleaning or blasting produces oily water, used solvent, contaminated absorbent, or spent media, identify the applicable handling route before the job begins. The EPA’s used-oil management guidance explains why used oil should be collected and managed rather than poured onto the ground or into a drain. Local requirements may add rules for wash water, blasting debris, and hazardous materials.
What to do first on your vehicle
Begin with a documented underside inspection before buying a coating. Wash away loose salt where practical, let the vehicle drain and dry, photograph the frame and cavities, and classify every finding as monitor, prepare and protect, or repair first. If you see perforation, severe scale at a suspension or body mount, a damaged boxed frame, or uncertainty about structural condition, arrange a qualified repair assessment before any undercoating work.
Then choose the least complicated plan that solves the actual problem: regular rinsing and inspection for a lightly exposed vehicle, targeted cavity and underside protection for sound metal, or disassembly and frame restoration when corrosion has hidden the condition of important components. Bay State Rust Prevention serves Central Massachusetts with rust prevention undercoating, rust removal, frame-off work, and automotive frame repair; contact Bay State Rust Prevention through baystaterustprevention.com when you need the inspection and preparation decisions handled before protection is applied.