
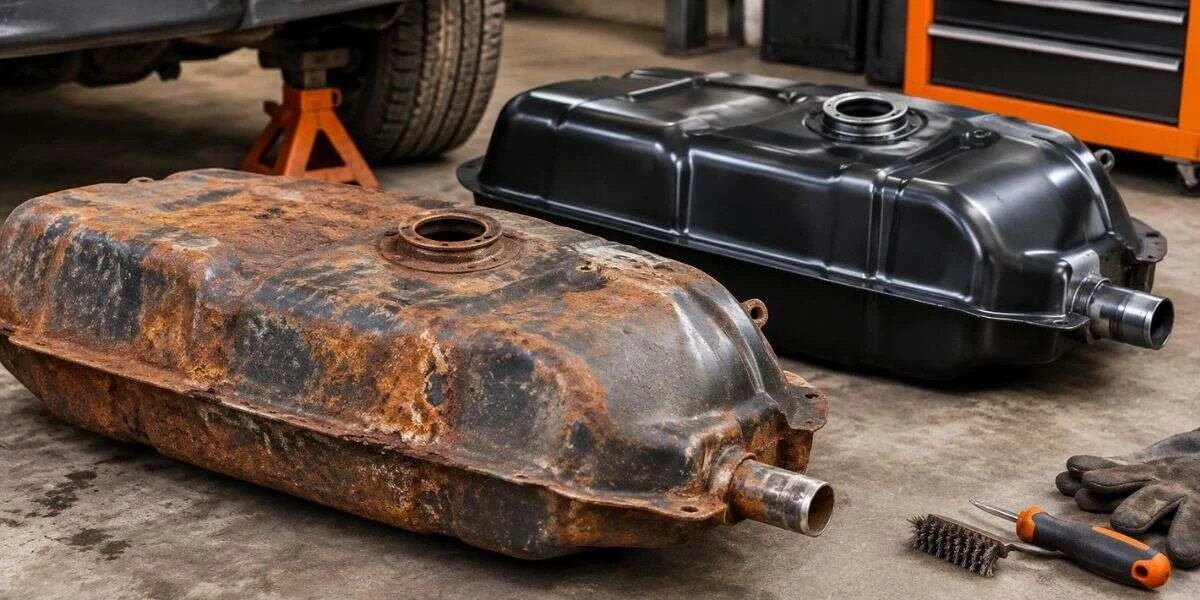

Gas tank rust repair starts with identifying the tank material and whether rust has eaten through it. Surface corrosion on a steel tank may call for a different response than a leak, deep pitting, or a damaged seam; a leaking or fuel-smelling vehicle should not be driven until it has been assessed. Have a qualified repair professional inspect the tank and related parts before deciding whether repair or replacement is appropriate. Gasoline and its vapors create a serious fire hazard, so this is not a job for improvised patching or casual hot work; OSHA’s rules for flammable liquids and welding describe the precautions required in workplace settings (OSHA flammable-liquids standard; OSHA welding and cutting standard).
Rust on your vehicle’s frame and underbody too? See our rust removal and sandblasting service for how the work is done, starting prices and booking.
First determine whether the tank is rusty, leaking, or both
“Rusty gas tank” can describe anything from orange discoloration on an exposed steel surface to corrosion that has thinned the tank wall. Those conditions are not interchangeable. Dirt, undercoating, road grime, or staining can also hide the actual condition, so appearance alone does not establish that a tank is sound, or that it needs replacing.
A technician should identify the tank design and material using vehicle information, then inspect the accessible surfaces and nearby fuel-system parts. Some tanks and components are not made of steel and cannot rust in the same way; brackets, straps, fasteners, filler parts, or nearby steel may still corrode. A repair decision based on the vehicle’s age or a quick look at one visible patch can miss the part that matters.
Signs that change the urgency
Active wetness, a persistent fuel odor, or visible dripping calls for prompt attention. Move away from ignition sources, do not start the engine, and arrange professional help rather than testing the tank by running the vehicle. If the leak is substantial or the vehicle is in an unsafe location, seek emergency assistance. Do not crawl under a vehicle to investigate a suspected leak.
- Dry surface discoloration: warrants inspection, but does not by itself prove that the tank is perforated.
- Flaking scale or deep pits: may indicate material loss that needs closer assessment, including at seams and mounting areas.
- Fuel odor or dampness: treat as a possible leak, not as a cosmetic rust issue.
- A warning light or fuel-system fault: needs diagnosis; a warning does not by itself identify the tank as the failed part.
Keep suspected fuel leaks away from flames, smoking, sparks, and electrical work. Do not try to confirm a leak with a match, heat gun, grinder, or other tool that could ignite vapor. OSHA’s flammable-liquid requirements address fire and explosion hazards in workplaces; the practical takeaway for an owner is to leave fuel handling and any hot work to appropriately equipped professionals.
Choose repair or replacement from the condition, not a quick patch
There is no single rust treatment that fits every fuel tank. The key questions are whether the tank is leaking, how much sound material remains, whether corrosion has reached a seam or mounting point, and whether the manufacturer allows a particular repair for that tank. If the tank wall is perforated or seriously weakened, a surface coating cannot restore the missing metal. A professional may recommend replacement rather than attempting to seal or coat the damaged area.
When the damage appears superficial
If corrosion is limited to a non-leaking exterior surface, the professional still needs to establish that it is genuinely surface-level and that treatment will not conceal a thinner area nearby. A suitable response might involve cleaning and protecting an accessible exterior, but the method depends on tank material, coatings, location, and service information for the vehicle. Do not assume that an abrasive process or a general-purpose rust product is safe for an installed fuel tank.
Keep the repair boundary clear: cleaning corrosion from an exposed metal surface is not the same as repairing a compromised fuel container. A tank can look better after cleaning while remaining too thin or damaged to use safely. Ask the shop what was inspected, what was treated, and whether any area could not be checked without removing the tank.
When a leak, seam defect, or serious corrosion is found
A leaking tank or corrosion through a seam requires a repair decision based on the tank’s construction and the vehicle’s service requirements. Depending on those findings, replacement may be the appropriate path; a professional should explain why a proposed repair is suitable for that specific tank. Avoid universal claims such as “a sealant fixes any tank” or “every rusty tank must be replaced.” Neither substitutes for examining the actual damage.
Do not weld, braze, solder, grind, or heat a tank as a do-it-yourself fix. OSHA’s welding and cutting standard addresses flammable vapors and precautions for work on containers; it is not a consumer instruction for making a tank safe to work on. Fuel removal alone does not establish that a container is safe for hot work. Ask the repair facility how it handles fuel, vapors, tank removal, and any proposed repair process.
What a careful inspection should cover
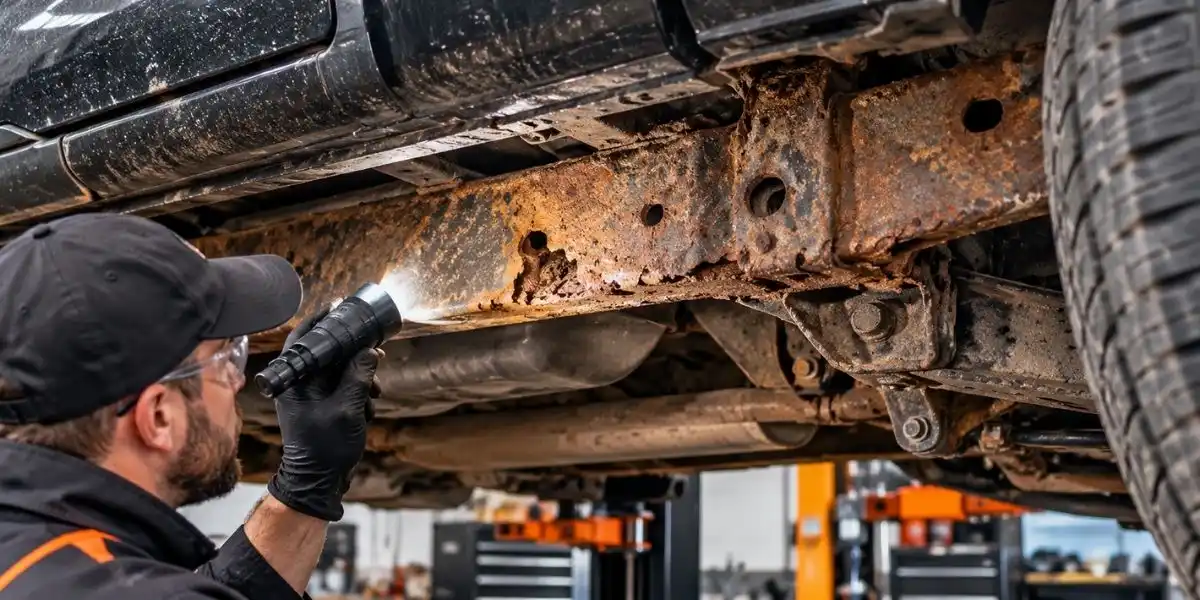
A useful assessment goes beyond the most visible rusty spot. The tank’s position, shields, straps, and nearby lines can limit what is visible while the vehicle is assembled. If access is blocked, the technician should say so and explain whether additional disassembly is needed to reach a sound decision. A written description or clear photos can help an owner understand why a tank is being repaired, replaced, or monitored.
Ask the shop to distinguish its observations from its conclusions. “Rust is present” is an observation; “the tank is safe to reuse” is a judgment that should account for material condition, leaks, attachment points, and any repair limits. If the vehicle has been modified, restored, or stored for a long time, tell the technician: non-original parts or previous coatings may change what can be inspected.
- Tank identity and material: confirm which tank is fitted and whether it matches the vehicle’s original configuration.
- Wall, seams, and joints: look for corrosion, seepage, distortion, or evidence of an earlier patch where accessible.
- Mounting hardware: assess straps, brackets, shields, and attachment areas; a sound tank still needs secure support.
- Connected components: inspect accessible filler and fuel-system connections for damage or corrosion that may be mistaken for a tank leak.
- Evidence and limits: ask what was directly inspected, what remains hidden, and what finding would change the recommendation.
A check-engine light is not a tank verdict. EPA’s overview of onboard diagnostics explains that OBD systems monitor vehicle emissions-related systems and can illuminate the malfunction indicator when a fault is detected (EPA’s OBD-II frequently asked questions). A diagnostic code can guide further testing, but it does not by itself prove that rust has caused a leak or that the tank needs replacement. Ask for the test result and the physical evidence connecting it to the recommended work.
Questions to ask before approving the work
When a shop recommends a tank repair, replacement, or removal, ask for a specific explanation rather than relying on a generic “rust treatment” label. The goal is to understand the risk, the proposed method, and what the work does, and does not, resolve. If the answer is unclear, ask the technician to show the affected area or provide a written finding before authorizing work.
- Where exactly is the corrosion? Ask whether it is on the tank itself, a strap, a seam, or a connected component.
- Is there evidence of a leak or wall loss? Ask what inspection supports that conclusion and whether the tank had to be removed to see the area.
- Why is this method suitable for this tank? Ask whether the recommendation follows the tank material and vehicle service information.
- What is the alternative? If repair is proposed, ask when replacement would be required; if replacement is proposed, ask what finding makes repair unsuitable.
- What else will be inspected? Clarify whether mounting hardware and accessible fuel connections are included in the assessment.
For a used-car buyer, a seller’s statement that the tank was “treated” is not enough to establish its current condition. Request the repair invoice and ask what part was treated, whether the tank was removed, and whether the work included a leak check. If the seller cannot document the work, arrange an independent inspection before treating the claim as proof of a safe tank.
If a vehicle is under recall, follow the manufacturer’s recall remedy rather than paying for an unrelated repair first. Owners can check for open safety recalls by vehicle identification number through NHTSA’s recall lookup. A recall search does not assess rust on an individual vehicle, so it complements rather than replaces a physical inspection.
Prevent a repeat, and keep fuel-system work separate from undercoating
After a tank has been assessed or replaced, prevention means limiting conditions that hold corrosive road contamination against exposed metal and checking vulnerable areas during routine maintenance. Owners who drive salted Massachusetts roads should pay particular attention to the underside after winter use, but a general rustproofing treatment is not a substitute for inspecting a suspect tank. Do not coat over active corrosion, a leak, or an area that has not been assessed.
Undercoating decisions should account for access and the part being protected. Fuel tanks, lines, seams, cavities, and frame surfaces are different targets; the proper product and application depend on the component and the vehicle. A corrosion-protection product should not be applied in a way that conceals an existing defect or interferes with inspection or service. For broader body and chassis protection, see the site’s guide to rust prevention undercoating.
- Have a suspected leak or fuel odor diagnosed before applying any protective product.
- Ask a technician to inspect tank supports and accessible nearby components when corrosion is being assessed.
- Keep repair records, including photos and notes on whether the tank was removed or replaced.
- When frame corrosion is the concern, distinguish structural work from fuel-tank work; frame blasting and repair do not automatically repair a tank.
Bay State Rust Prevention’s verified work includes vehicle corrosion assessment, frame-off disassembly and sandblasting, and automotive frame repair; the supplied service information does not establish that the business repairs or replaces fuel tanks. Before booking, ask whether your specific tank concern is within scope and who should inspect it if not. For frame corrosion work, frame-off rust removal explains the relevant service, and baystaterustprevention.com is the place to review Bay State Rust Prevention’s verified rust-removal and frame-restoration capabilities.