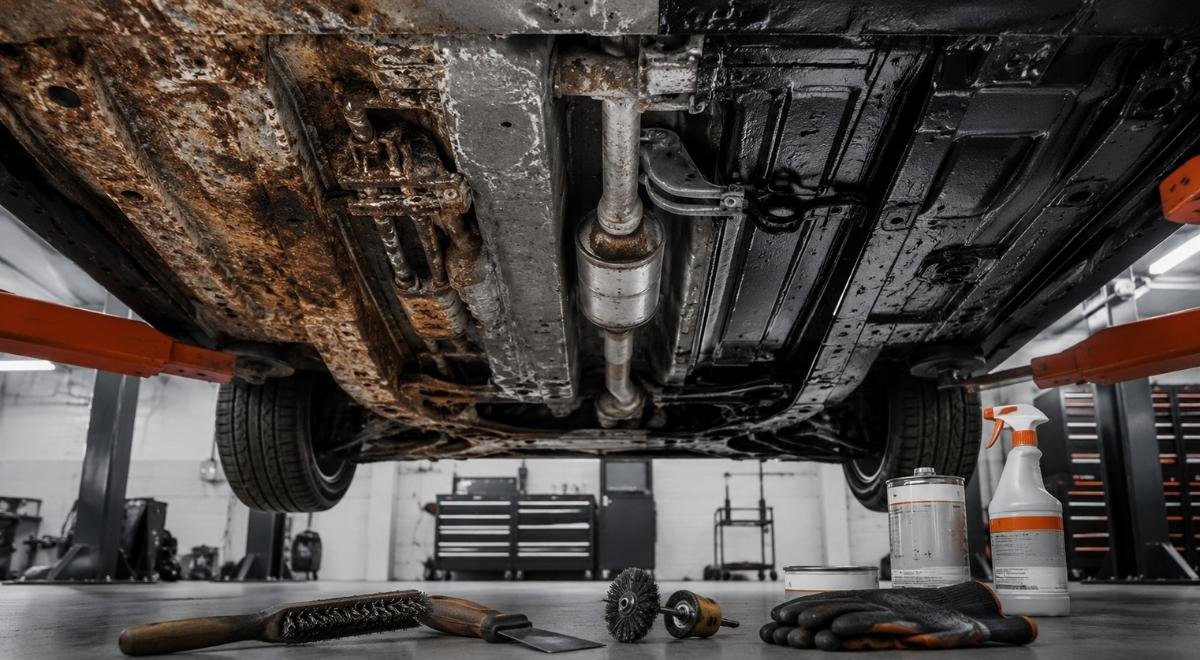
Car undercarriage rust removal is not simply a matter of scraping brown scale until the metal looks clean. A proper job should leave you with a documented decision: what can be cleaned, what must be repaired, what should be replaced, and how the remaining metal will be protected from the next Central Massachusetts winter. This guide takes you from a safe inspection through cleaning, structural evaluation, repair, coating, and follow-up so you can make a sensible plan for a daily driver, leased truck, fleet vehicle, or restoration project.
Road salt matters because it keeps a wet, electrically conductive film on steel and reaches seams, brackets, brake lines, and boxed frame sections that are difficult to rinse. The Federal Highway Administration describes corrosion and infrastructure damage associated with deicing chemicals, while also noting that salt use is tied to winter safety practices; the practical vehicle lesson is not “never drive in salt,” but remove contaminated moisture and inspect trapped areas. See the FHWA discussion of winter maintenance and corrosion at its official report on road salt and highway maintenance.
Define the outcome before removing anything
Start by deciding what “done” means for this particular vehicle. A newer leased crossover may need a clean inspection, light corrosion removal, and a reversible protective treatment. A ten-year-old pickup may need brake-line replacement, welded frame repair, or a decision that the repair is not economically sensible. A classic vehicle may justify complete disassembly and media blasting because preserving original brackets and seams matters more than minimizing shop time.
Do not begin with a coating decision. Coating over loose scale can hide active corrosion, trap salt, and make the next inspection harder. Begin with a written condition record that separates cosmetic oxidation from metal loss and separates non-structural parts from load-bearing members.
Record condition, use, and constraints
Photograph the vehicle before washing it. Include the frame rails, crossmembers, suspension mounting points, fuel and brake lines, body mounts, rocker panels, spare-tire area, and any previous patches. Record mileage, use, storage, recent repairs, and whether the vehicle must remain operational for work. For a fleet, add the unit number and the date so repeated inspections can show whether a problem is progressing.
- Vehicle objective: preserve, restore, sell, keep roadworthy, or prepare for coating.
- Corrosion exposure: daily winter use, occasional use, beach or industrial exposure, indoor storage, or mixed conditions.
- Access requirement: wheels-on inspection, lift inspection, component removal, or complete frame-off access.
- Repair boundary: cleaning only, parts replacement, certified welding, restoration fabrication, or replacement vehicle evaluation.
- Evidence needed: photographs, thickness readings, repair estimate, inspection documentation, or a before-and-after record.
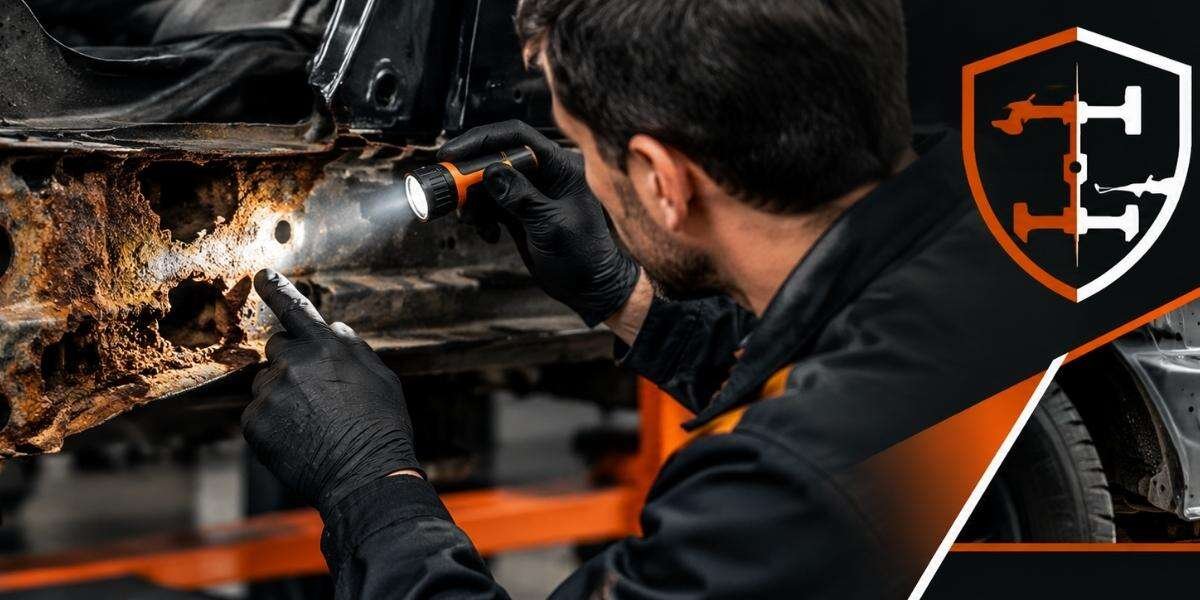
Use a lift and adequate lighting when possible. A driveway view cannot reliably show the top of a frame rail, the inside of a boxed section, or corrosion under a fuel-tank shield. Never rely on a jack alone while striking or pulling on rusted components. Support the vehicle according to the manufacturer’s service information, keep ignition sources away from fuel-system work, and treat compressed air as a hazard around dust and debris.
Set a stop-work rule
Before cleaning, agree that certain findings stop the cosmetic portion of the job. Examples include a cracked suspension mount, a perforated frame rail, a loose body mount, a brake line that flakes when touched, or metal that bends under light probing. The correct next step may be measurement, disassembly, welding by a qualified professional, or replacement—not more aggressive blasting.
Massachusetts inspection rules are a useful reminder that vehicle condition is not only an appearance issue. The Massachusetts Registry of Motor Vehicles publishes inspection requirements and safety-related rejection information at its official vehicle safety and emissions inspection page. Requirements can change, so use the current state material and have a qualified inspector or repair professional evaluate uncertain structural conditions.
Wash, dry, and expose the corrosion without creating new damage
Cleaning is diagnostic. Salt residue can make sound steel look worse, while oily dirt can conceal a perforation. The goal is to remove loose contamination without forcing water, grit, or solvent into bearings, electrical connectors, brake components, or seams that cannot be dried.
Use a controlled cleaning sequence
- Remove loose mud and packed salt with a low-pressure rinse or soft brush.
- Clean accessible surfaces with a vehicle-safe detergent, working from the cleanest areas toward the dirtiest.
- Protect exposed electrical connectors, alternator openings, air intakes, and sensitive sensors from direct spray.
- Allow the undercarriage to dry completely before deciding how much corrosion is present.
- Use bright inspection lighting and a blunt pick or inspection probe only where safe and appropriate.
Drying is part of the inspection, not an optional cosmetic step. Water in a boxed rail, seam, or folded bracket can make a surface look temporarily clean while leaving contamination behind. Use ventilation and time rather than heat applied indiscriminately near fuel, rubber, plastics, or underbody coatings.
Do not pressure-wash a compromised underbody as though pressure can substitute for inspection. A strong stream may remove a thin rust layer that was masking a hole, drive grit into a seal, or detach a brittle shield. It can also spread contaminated dust and flakes into the work area. If the vehicle has thick undercoating, identify whether it is sound, swollen, cracked, or separating before attempting to remove it.
Sort what you see into four conditions
- Surface oxidation: discoloration or light scale with no apparent section loss.
- Layered scale: rust laminations that may be lifting from the steel and concealing a thinner section.
- Perforation: a hole, open seam, missing flange, or visible loss of continuity.
- Contaminated coating: old material that is loose, oil-soaked, salt-filled, or detached from the substrate.
These categories are working descriptions, not a substitute for a structural inspection. A frame can retain an unbroken outer skin while losing important thickness inside. Mark each concern with removable tape or a photograph reference. Avoid grinding every brown area immediately; you need a baseline showing where the metal was suspect before aggressive cleaning.
Choose the removal method for the metal and the access
There is no universally best rust-removal tool. Mechanical scraping, wire brushing, abrasive wheels, blasting, chemical conversion, and component replacement each solve a different problem. The choice depends on thickness, geometry, contamination, access, desired finish, and whether nearby parts can tolerate heat, vibration, dust, or rebound.
| Condition or objective | Starting method | What to verify before proceeding | Stop or change method when |
|---|---|---|---|
| Light surface oxidation on accessible steel | Scraper, hand brush, or controlled power brushing | Edges remain solid and no hidden seam opens | Scale lifts in sheets or the tool exposes a thin section |
| Heavy scale on a serviceable frame | Mechanical removal followed by targeted abrasive work | Nearby lines, wiring, seals, and shields are protected | Metal flexes, heats excessively, or reveals perforation |
| Complex brackets or removable components | Remove the component before cleaning or blasting | Fasteners, orientation, and replacement availability are documented | Removal risks damaging a critical part or breaks a seized mount |
| Large exposed frame or restoration shell | Professional controlled blasting after disassembly | Media, containment, ventilation, and post-blast cleaning are planned | Dust can enter bearings, engines, interiors, or unprotected cavities |
| Thin, perforated, or structurally uncertain metal | Inspection and repair plan before cosmetic removal | Repair design and qualified welding capability are available | Cleaning is being used to avoid deciding whether replacement is needed |
Understand the trade-offs
Wire wheels are convenient, but they can polish rust into a dark surface without removing deep pits. Grinding is fast, but it can thin edges and create heat-affected damage. Abrasive blasting reaches irregular surfaces more effectively, yet it can drive media into seams and leave bare steel that begins oxidizing quickly. Chemical products may help with small removable parts, but they do not restore lost metal and require compatibility, ventilation, and waste-handling decisions.
Never blast a complete vehicle casually. Covering the visible body is not enough; abrasive media can travel through openings and damage wheel bearings, door mechanisms, wiring, HVAC components, and engine accessories. A frame-off project or a removed component is easier to contain and inspect than an assembled vehicle. For major access work, the relevant service may be frame-off rust removal, particularly when the frame and related components need to be separated for thorough evaluation.
Abrasive blasting also creates respiratory and housekeeping hazards. The Occupational Safety and Health Administration explains hazards and control considerations for abrasive blasting, including dust exposure and protective equipment, on its official abrasive-blasting safety page. That guidance is aimed at workplaces, but the mechanism applies to a home garage: identify the abrasive, contain the dust, protect people nearby, and do not assume a disposable mask makes an uncontrolled operation safe.
Illustrative starting policy for method selection
An example policy—not a universal benchmark—is to reserve hand and power tools for small accessible areas, remove parts before blasting whenever practical, and stop cosmetic work immediately when a probe enters metal or a mount moves independently of its surrounding structure. Adjust that policy if inspection reveals thinner material, difficult containment, more extensive hidden corrosion, or a restoration requirement for a uniformly prepared surface.
Determine whether the corrosion is cosmetic, serviceable, or structural
After loose rust is removed from a limited test area, inspect the geometry that carries load or locates a component. Focus on frame rails, crossmembers, suspension brackets, steering mounts, spring hangers, control-arm mounts, body mounts, seat-belt anchors, and regions where water collects. On unibody vehicles, inspect seams, pinch welds, subframes, rocker structures, and reinforcement sections rather than looking only for a traditional ladder frame.
Look for mechanisms, not just color
- Section loss: the steel is visibly thinner, perforated, or missing at an edge.
- Delamination: layers are separating, especially around frame flanges and boxed sections.
- Movement: a mount, bracket, or shield moves when the connected component should remain rigid.
- Distortion: a rail, flange, or mounting surface is bent, buckled, or no longer symmetrical.
- Contamination inside cavities: rust scale or wet debris can be heard or seen through drain holes.
Do not certify a frame by appearance. A clean-looking patch can still leave a weak surrounding section, and a thick coating can hide an unfinished repair. Thickness measurement, access to both sides, comparison with an unaffected area, and a repair professional’s judgment may all be necessary. If the vehicle has a known collision history, add alignment and mounting-point checks to the corrosion evaluation.
For safety-critical work, use the manufacturer’s service information and applicable repair procedures. Welding a suspension mount or frame rail is not equivalent to welding a decorative bracket. Heat, fit-up, material grade, access, and corrosion extending beyond the visible area all affect the repair. If you cannot identify the load path and the original section, do not improvise a plate over the problem.
Worked example: a salt-exposed pickup
Consider an illustrative 2014 pickup used every weekday between Worcester and surrounding towns. The owner sees bubbling under the rear frame coating and wants a quick spray treatment. The initial photographs show scale around a spring hanger, a packed cavity near the spare tire, and a brake line with flaking corrosion.
- The shop washes and dries the underside, then photographs and labels each area.
- A small test section shows the coating is detached and the frame flange has layered scale.
- Controlled cleaning reveals a pinhole near the spring-hanger reinforcement and significant scale inside the accessible cavity.
- The spring hanger and brake line are treated as separate repair decisions; neither is hidden under new coating.
- A qualified repair assessment determines whether the hanger area can be repaired with an engineered section or whether component replacement is required.
- Only after repair, inspection, and final cleaning does the owner choose a cavity and exterior protection plan.
The important outcome is not a prettier frame. It is that the owner avoids paying to preserve an unsafe condition and avoids replacing sound parts merely because the entire underside looked uniformly rusty. The same logic works for a fleet: rank units by structural risk and downtime, not by which one has the darkest surface.
Repair or replace the damaged components before protection
Rust removal exposes decisions that cleaning alone cannot solve. A corroded brake line, fuel strap, exhaust hanger, heat shield, fastener, or body mount may be cheaper and safer to replace than to restore. A frame section or suspension mount may require fabrication, welding, dimensional checks, and a final inspection. The protection stage begins only after those decisions are closed.
Build a repair boundary
For each marked area, write down the component, its function, the visible damage, the access needed, and the proposed disposition. Use “clean,” “replace,” “repair,” or “monitor” only when the evidence supports that label. “Monitor” should mean a documented condition with a next inspection date, not a polite way to postpone an unsafe decision.
- Replace brake, fuel, or hydraulic lines when corrosion has compromised the tube or its fittings.
- Replace weakened shields, straps, clips, or fasteners when their failure could allow movement or contact.
- Obtain a structural repair plan for frame rails, subframes, crossmembers, and suspension mounts.
- Confirm wheel alignment, ride height, and mounting geometry after structural work.
- Clean weld-adjacent surfaces thoroughly before applying any coating.
Coating is not a structural repair. It cannot restore tensile capacity, reconnect a separated seam, or make an unsafe bracket reliable. Nor should a thick patch be welded over scale without removing unsound metal and understanding how the repair transfers load. On a classic vehicle, preserving originality may influence whether a section is fabricated, replaced, or retained; on a work truck, predictable serviceability may be the higher priority.
If paint or old coatings may contain lead or other hazardous materials, plan the removal accordingly. The Environmental Protection Agency discusses lead-safe renovation practices and containment at its official Renovation, Repair and Painting program page. That page is not a vehicle-specific repair manual, so identify the actual coating and follow applicable workplace, waste, and hazardous-material requirements rather than assuming all underbody paint is harmless.
Illustrative decision thresholds
An illustrative starting policy might require a second opinion whenever a structural mount moves, a probe enters a frame section, or a repair area extends beyond the visibly prepared metal. These are caution triggers, not legal or engineering limits. Adjust them downward for a heavily loaded truck, a vehicle carrying passengers daily, uncertain accident history, or corrosion inside a boxed member. Adjust the work plan upward when measurement shows the damage is localized and the surrounding metal is sound.
Prepare bare steel and apply protection as a maintenance system
Once cleaning and repairs are complete, the surface must be compatible with the chosen protection. Bare steel needs prompt handling because humidity, fingerprints, salt residue, and trapped abrasive can restart corrosion before the vehicle leaves the bay. Follow the product’s technical data for preparation, coverage, cure, recoat, and prohibited substrates; do not combine products merely because each one sounds corrosion-resistant.
Choose protection by exposure and inspection needs
A cavity treatment is intended for areas such as seams and enclosed sections where a creeping, moisture-displacing film can reach around overlaps. An exterior underbody coating needs adhesion, abrasion tolerance, and a finish that still permits future inspection. A restoration may call for a paint system over correctly prepared steel, while a winter daily driver may need a maintainable protective film that can be renewed after washing and inspection.
Preserve drain paths and inspection points. Do not fill drain holes, cover weep paths, block fasteners needed for service, or coat hot exhaust components unless the product specifically permits it. Keep overspray off braking friction surfaces, tires, belts, sensors, electrical connectors, and steering joints. Masking is not a cosmetic courtesy; it prevents a protection job from creating a new mechanical problem.
For a daily driver or fleet vehicle, a dedicated rust prevention undercoating can be part of a broader maintenance plan. It should follow—not replace—the removal of loose scale, repair of compromised metal, and cleaning of salt-contaminated surfaces. For restored components, select a coating system that matches the intended storage and use environment, including whether parts will be handled, exposed to gravel, or periodically disassembled.
Use an inspection-and-renewal checklist
- Verify that repaired areas are solid, dimensionally correct, and free of loose scale.
- Confirm that brake, fuel, electrical, exhaust, and suspension components are correctly routed and secured.
- Check that drain holes, access holes, and service fasteners remain usable.
- Apply only compatible products to the specified level of cleanliness and dryness.
- Record product name, application date, repaired areas, and photographs.
- Inspect after the first substantial winter exposure and after any underbody impact.
- Re-clean and renew protection where it is worn, washed away, cracked, or contaminated.
An illustrative starting policy for a salt-exposed personal vehicle is to perform a post-winter inspection once each spring and an additional inspection after any collision, deep-water event, or underbody strike. For a commercial fleet, a monthly visual check during the salt season may be a reasonable starting policy if vehicles accumulate heavy mileage; adjust the interval when inspections show rapid coating loss, persistent wet debris, frequent gravel impacts, or little change over multiple cycles. The signal should determine the interval, not a calendar promise.
| Record field | Example entry | Why it matters |
|---|---|---|
| Area | Left rear spring-hanger mount | Allows the same location to be compared later |
| Condition before work | Detached coating, layered scale, suspected perforation | Shows why cleaning or repair was authorized |
| Disposition | Structural assessment and repair; no coating until cleared | Prevents protection from hiding unfinished work |
| Protection applied | Compatible exterior or cavity product, documented by product label | Preserves application information for future service |
| Next trigger | Spring inspection or any impact in the area | Connects maintenance to actual exposure and damage |
Make the first appointment or inspection decision now
First, photograph and map the undercarriage before scraping or coating it. Then wash and dry the vehicle, inspect the frame and mounting points with proper support and lighting, and classify every concern as surface oxidation, layered scale, perforation, or structural uncertainty. Do not authorize a blanket coating until the repair boundary is clear.
For a new vehicle or leased vehicle, ask for an access-controlled inspection and a protection plan that preserves drain holes and future service points. For a salt-damaged daily driver, request a written separation between cleaning, replacement parts, structural repair, and coating. For a classic, specialty vehicle, or outsourced shop project, discuss whether components should be removed and whether frame-off rust removal is appropriate for the level of access required.
Bring these questions to the provider:
- Which areas are being cleaned, and which are being removed for access?
- How will the shop identify metal loss hidden under old coating?
- Which findings stop coating and require repair or replacement?
- How will brake lines, wiring, bearings, exhaust parts, and drain paths be protected?
- What photographs and maintenance notes will be supplied afterward?
If the vehicle needs corrosion assessment, undercoating, frame restoration, or controlled rust removal in Worcester and Central Massachusetts, Bay State Rust Prevention can help define the appropriate scope rather than treating every underside the same. Start with the site’s rust prevention, rust removal, and frame repair services at baystaterustprevention.com, and bring the photographs and condition map to the conversation.