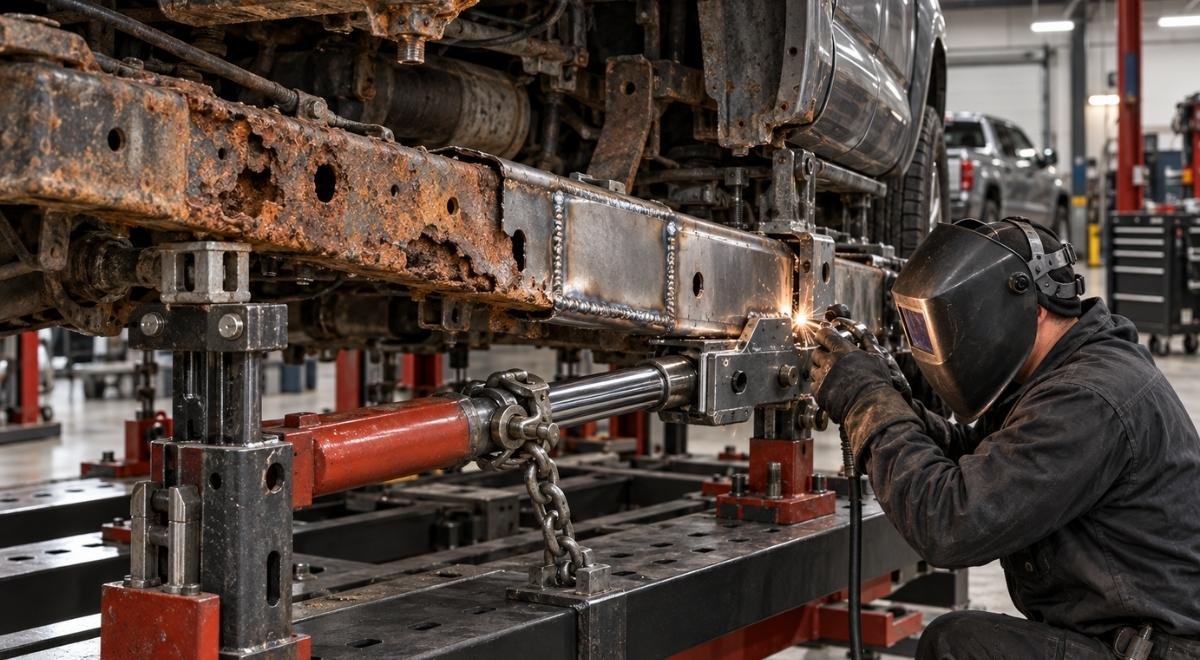
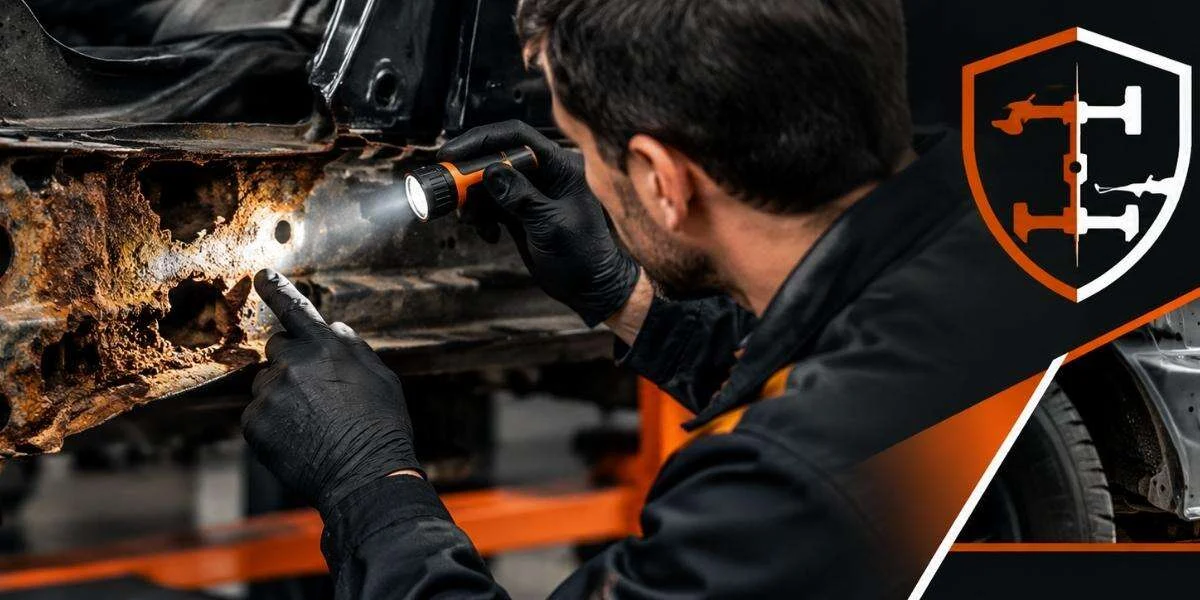
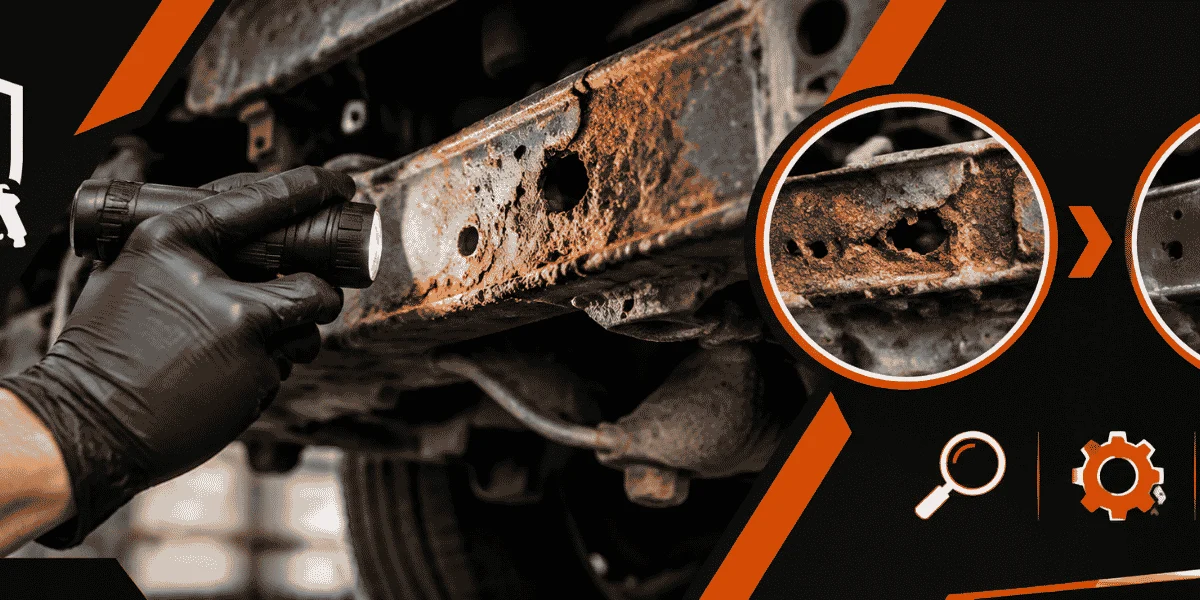
Bent car frame repair is the process of measuring, correcting, reinforcing, or replacing a vehicle’s structural frame after collision damage, corrosion, or both. It is not the same as pulling a visibly crooked bumper bracket or replacing a bent suspension component. A frame can look reasonably straight while its mounting points, rails, crossmembers, or crumple zones are no longer positioned correctly.
For vehicle owners in Worcester and Central Massachusetts, the difficult cases often involve collision distortion combined with road-salt corrosion. Rust can thin a boxed rail, separate a seam, or hide perforation beneath undercoating. A repair that ignores that loss of metal may restore appearance without restoring dependable structure. The right sequence is therefore diagnosis first, structural correction second, and corrosion protection only after sound metal has been established.
What Bent Car Frame Repair actually includes
A vehicle frame is the load-carrying structure that supports the body, powertrain, suspension, steering, and crash-management components. On a body-on-frame pickup, the frame is a separate ladder-like assembly. On many cars and crossovers, the structure is an integrated unibody made from rails, pillars, floor sections, aprons, and reinforced load paths. People commonly call both systems a “frame,” but the repair decisions are different.
Frame damage is a geometry problem as well as a metal problem. A technician must determine whether the structure has moved from its intended position, whether the metal has stretched or buckled, and whether rust has reduced its remaining strength. A bent rail may be repairable if it can be returned to specification without creating a weakened crease. A perforated rail may require section replacement or a larger structural repair. A badly compromised area may make the vehicle unsuitable for economical restoration.
Three conditions that are often confused
- Cosmetic damage: surface rust, scaling, or dents in nonstructural brackets may affect appearance without changing the primary load path.
- Alignment damage: a shifted frame rail, crossmember, suspension mount, or body mount can change wheel position, steering behavior, and panel gaps.
- Strength loss: perforation, cracked welds, torn seams, severe thinning, or buckling can reduce the structure’s ability to carry normal loads or manage a collision.
A proper assessment separates these conditions instead of treating every rusty or bent part as interchangeable. For example, a replacement body mount may correct a height issue while leaving a rust-thinned rail underneath it. Conversely, a surface-scaled rail may be structurally serviceable after cleaning and inspection even though it looks alarming before the scale is removed.
Body-on-frame and unibody decisions
On a pickup, technicians can often inspect the frame from end to end after lifting or removing body components. They look at rails, crossmembers, suspension attachment points, steering-box areas, spring hangers, and body mounts. A straight-looking center section does not eliminate concern around a rear shackle mount or front suspension bracket.
On a unibody vehicle, the repair may involve floor pans, rocker reinforcements, front rails, strut towers, apron assemblies, or rear body sections. These components work as a system. Structural panels are not ordinary sheet metal patches; their thickness, overlap, weld locations, and corrosion condition affect the repair. A casual plate welded over a hole can trap moisture and create a hard edge that does not reproduce the original load path.
Why corrosion changes the repair decision
Central Massachusetts vehicles face a recurring combination of moisture, freeze-thaw cycles, and winter deicing material. Salt residue remains in seams, inside boxed sections, behind liners, and around fasteners. When a vehicle already has a bent rail or damaged mount, those areas can hold water and deteriorate faster than an undamaged surface.
Rust can conceal the true failure boundary. Scale lifts away from sound metal, making a rail appear thicker than it is. A mounting bracket may remain attached at its edges while the surrounding floor or rail has lost material. Undercoating can also hide bubbling, seam separation, and perforation until it is removed or opened for inspection.
That is why the first stage of rust-related frame work is not automatically welding. It is controlled exposure of the metal and documentation of what remains. A useful inspection may include:
- Cleaning loose scale and dirt from both sides of the suspected area.
- Checking whether a pick, probe, or calibrated thickness method reveals soft or perforated metal.
- Examining weld seams for cracks, separation, and torn flanges.
- Comparing left and right frame sections where the design is symmetrical.
- Inspecting suspension, steering, brake-line, fuel-line, and body-mount attachment points.
- Recording photographs and measurements before cutting, pulling, or welding.
These steps do not replace the vehicle manufacturer’s repair information. Manufacturer procedures determine approved sectioning locations, weld methods, adhesives, fasteners, and measurement points for many modern vehicles. If the vehicle has collision-related safety-system damage, the owner should also check for open recalls or safety campaigns through the official NHTSA recall lookup; a recall record is not a substitute for a structural inspection, but it can reveal an unresolved safety issue relevant to the repair decision.
Salt damage is not evenly distributed
A vehicle can have a clean-looking outer rail and serious corrosion at a trapped seam. Common concentration points include:
- Rear spring hangers and shackle mounts on pickups.
- Front control-arm, steering, and subframe attachment points.
- Body mounts where rubber or metal isolators hold moisture against the structure.
- Drain holes blocked by dirt, leaves, or thick coating.
- Overlapping seams near wheel wells and floor edges.
- Areas where a previous repair created a pocket between plates.
Rust removal must reveal sound metal before coating begins. A protective product applied over active scale may slow access to the surface while leaving the structural question unanswered. For an older truck or restoration project, a broader frame-off rust removal can make sense when localized cleaning cannot distinguish isolated scale from widespread section loss.
How the repair process works from inspection to protection
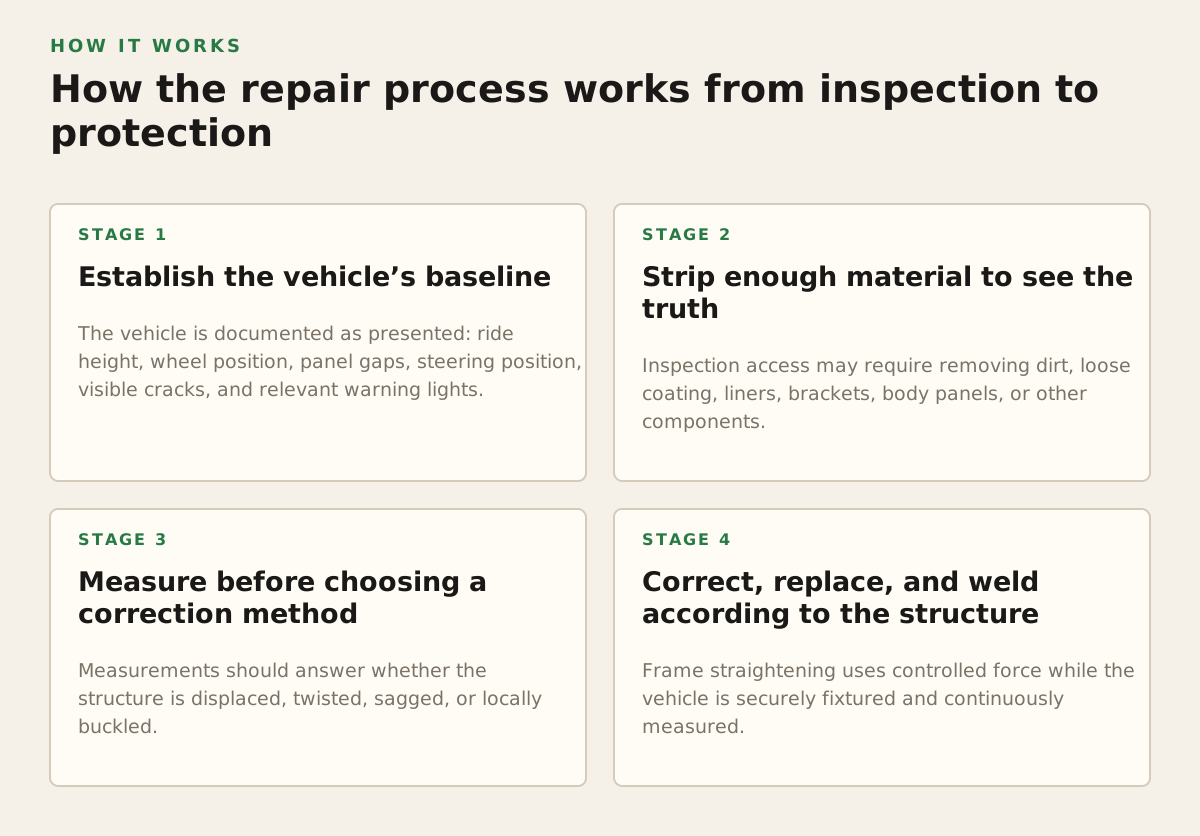
A sound repair follows a sequence because each step answers a different question. Pulling before measuring can disguise the original distortion. Welding before removing corrosion can lock weak metal into the repair. Coating before confirming drainage can preserve the problem inside a cavity.
1. Establish the vehicle’s baseline
The vehicle is documented as presented: ride height, wheel position, panel gaps, steering position, visible cracks, and relevant warning lights. Measurements should use the manufacturer’s specified datum points whenever available. For a frame-on-body vehicle, the body may need to be checked separately from the frame so that a shifted body mount is not mistaken for a bent rail.
At this stage, the technician should identify whether the vehicle is safe to move under its own power. A cracked steering mount, separated suspension attachment, compromised brake line, or unstable spring hanger may require transport rather than a road test. Do not use a short drive as proof that a frame is sound; some structural defects show up only under braking, cornering, loading, or a later impact.
2. Strip enough material to see the truth
Inspection access may require removing dirt, loose coating, liners, brackets, body panels, or other components. The goal is not to strip every part automatically. The goal is to expose the suspected load path and the surrounding transition areas. Abrasive blasting can be effective for large restoration work, but it must be controlled around thin panels, sealed cavities, wiring, glass, rubber, and components that can be damaged by abrasive media.
Work involving abrasive media also has health and environmental controls. The U.S. Occupational Safety and Health Administration identifies hazards associated with abrasive blasting, including dust and exposure to materials in the blasting media or coating being removed; its abrasive blasting safety guidance covers engineering controls, respiratory protection, cleanup, and related precautions. The practical implication is simple: frame-off blasting is a process requiring containment, appropriate equipment, and substrate inspection afterward, not merely a more aggressive version of pressure washing.
3. Measure before choosing a correction method
Measurements should answer whether the structure is displaced, twisted, sagged, or locally buckled. A technician may compare diagonal dimensions, height points, crossmember locations, and suspension mounting coordinates. The exact numbers depend on the vehicle and must come from service information or an appropriate measuring system.
A useful inspection record distinguishes:
- Position error: the component is in the wrong place but may not be permanently deformed.
- Plastic deformation: the metal has yielded and remains bent after load is removed.
- Local buckling: a rail or flange has folded, crushed, or developed a sharp crease.
- Twist: one end or side has rotated relative to the rest of the structure.
- Corrosion loss: the original cross-section is no longer present.
These conditions can overlap. Hydraulic pulling may correct position error, but it cannot restore metal lost to corrosion. A new plate may restore thickness in a localized area, but it cannot automatically correct a twisted frame. A section replacement may be safer than trying to flatten a heavily buckled rail because repeated heating and force can alter the material and surrounding geometry.
4. Correct, replace, and weld according to the structure
Frame straightening uses controlled force while the vehicle is securely fixtured and continuously measured. The aim is not to make the part look straight from one angle. It is to return critical points to the applicable specification without overstressing adjacent areas. On some repairs, controlled pulling is appropriate. On others, replacement of a damaged section or complete component is the more defensible path.
Welding requires clean, sound base metal and a procedure suited to the material and joint. High-strength steels, galvanized surfaces, aluminum, and mixed-material structures each introduce different risks. Excessive heat can distort a panel or change material properties; insufficient penetration can leave a joint that looks complete but does not carry the intended load.
Rust repair and structural repair must be treated as one decision. If corrosion extends past the planned cut line, the cut must move into sound material or the repair design must change. If a patch creates a water trap, the repair may fail even when the welds are intact. Drainage, access for coating, and protection of the opposite side belong in the repair plan before the first piece is fabricated.
5. Protect the finished metal
Once the structure is sound, bare steel needs a compatible corrosion-control system. Preparation may include removing residue, treating accessible seams, applying suitable primers or coatings, sealing joints where appropriate, and protecting cavities without blocking drainage. The correct choice depends on whether the surface is bare, painted, galvanized, repaired, or enclosed.
For vehicles that remain in service through Massachusetts winters, a professional rust prevention undercoating treatment can be part of the maintenance plan after structural work is complete. WaxOyl is used by Bay State Rust Prevention for corrosion protection, but no coating should be presented as a substitute for removing active scale, repairing perforation, or correcting a damaged frame.
Where bent-frame repairs break down
Most poor outcomes are not caused by one dramatic mistake. They come from a sequence of reasonable-looking shortcuts that leave an unknown condition hidden. Understanding the failure modes helps an owner evaluate an estimate and helps a repair shop decide when to outsource specialized work.
Covering rust instead of removing it
A thick coating can make a repaired section appear finished while corrosion continues beneath it. This is especially risky at seams, folded flanges, and boxed rails where salt and moisture remain. Coating has value after preparation; it is not a structural filler.
Welding to thin or contaminated metal
Rust, oil, old undercoating, paint, and trapped moisture interfere with sound welding. Welding across a thin edge may produce burn-through or a bead sitting on top of weakened material. A larger plate does not solve the issue if the plate is attached to metal that cannot carry the load.
Pulling without a measurement plan
A frame can be pulled into a visually pleasing position while a suspension mount remains displaced. Uncontrolled force can also move an adjacent section or create a new buckle. Every major correction should have a before-and-after measurement record, with critical mounting points checked rather than relying on panel fit alone.
Ignoring components attached to the damaged area
A bent frame may have also damaged control arms, steering links, brake lines, fuel lines, wiring, exhaust hangers, driveshaft angles, or body mounts. On a pickup, a spring hanger that is only slightly displaced can affect axle position and tire clearance. On a unibody car, a changed strut-tower position can create alignment problems even after a rail appears straight.
For collision-related repairs, the Massachusetts inspection program is relevant to the final road-use question. The official Massachusetts Vehicle Check information explains inspection requirements and safety-related inspection categories; passing inspection should not be treated as proof that every hidden structural or corrosion concern has been fully restored. Inspection, repair documentation, alignment results, and a structural assessment answer different questions.
Using a universal patch on a vehicle-specific structure
There is no single patch shape, thickness, or weld pattern that is appropriate for every frame. A repair must account for the original section, load direction, access, corrosion boundary, and manufacturer guidance. On a restoration vehicle, preserving original geometry may matter more than speed. On a daily driver, parts availability and future corrosion access may drive a different but still defensible plan.
Skipping post-repair verification
After correction, the vehicle should be checked for alignment, steering-center position, wheelbase or track discrepancies where applicable, clearance, ride height, fluid-line security, and operation of related systems. A road test, when safe and appropriate, is one part of verification—not the entire verification process.
How practitioners apply the process to real vehicle decisions
The best repair recommendation depends on the vehicle’s purpose, structural condition, remaining value, and owner’s tolerance for future work. A daily commuter, a fleet truck, and a classic restoration should not receive the same decision simply because all three have “frame rust.”
Illustrative case: a salt-exposed pickup
Consider an illustrative 2014 pickup with a front-end impact and visible rust near one suspension mount. The owner reports that the truck drives straight, but the steering wheel is off-center and the front tire sits slightly rearward in the wheel opening. Those symptoms justify measurement rather than reassurance.
- Document the wheel position, steering angle, ride height, and visible rust.
- Inspect the frame rail, crossmember, control-arm mount, steering components, and nearby brake and fuel lines.
- Remove loose scale and coating around the suspected mount.
- Measure the vehicle against the applicable frame and suspension reference points.
- Decide whether the mount is displaced, the rail is buckled, or corrosion has reduced the section.
- Choose controlled correction, component replacement, structural section repair, or a stop-work recommendation.
- Verify alignment and protect the repaired area only after the structure and drainage are sound.
The owner should receive an explanation of what was measured, what metal was removed, what was replaced, and what remains outside the repair scope. That documentation matters when the vehicle is later sold, inspected, insured, or returned for corrosion maintenance.
Illustrative decision numbers, not universal limits
The following figures are illustrative planning examples only, not safety thresholds or manufacturer specifications:
| Observed condition | Illustrative action | Why the decision changes |
|---|---|---|
| 1 localized area of surface scale with intact surrounding metal | Clean, inspect, document, and protect | There may be no structural section loss after scale is removed. |
| 2 or more nearby mounting areas with perforation | Expand inspection and consider section replacement | Corrosion may extend beyond the visible opening and affect alignment points. |
| 3 measured reference points displaced from the applicable specification | Use controlled correction or replacement based on the structure | Visual panel fit is not enough to establish geometry. |
| 4 separate systems showing damage—such as frame, steering, brake line, and suspension | Prepare a complete safety and economic assessment | The repair scope may be larger than the original frame concern. |
These numbers demonstrate how a decision can be organized; they do not establish that one, two, three, or four findings automatically require a particular repair. Manufacturer procedures and an experienced structural assessment control the actual recommendation.
Classic and specialty vehicle applications
Classic vehicles create a different set of trade-offs. Original rails may be rare, replacement sections may require fabrication, and owners may care about preserving factory construction. Sandblasting can reveal old repairs, brazed seams, filler, and previous patches that are invisible beneath paint. At the same time, aggressive blasting can distort thin panels or remove evidence that should be photographed before cleaning.
A restoration plan should therefore specify which parts will be removed, which areas will be blasted, how seams will be documented, and how bare metal will be protected between stages. If lead-containing coatings or old paint are possible, the work must follow appropriate safety controls. The U.S. Environmental Protection Agency’s Renovation, Repair and Painting program guidance explains lead-safe requirements for covered renovation work; the exact applicability depends on the property, activity, and jurisdiction, but the hazard should not be ignored during disassembly and coating removal.
Fleet and repair-shop applications
For a fleet, the practical question is often downtime and repeatability. A useful intake form can record unit number, operating route, previous corrosion treatment, frame concern, photographs, and whether the vehicle carries heavy loads. Consistent documentation helps separate a one-off collision repair from a recurring corrosion pattern across similar vehicles.
- Prioritize vehicles with damaged steering, suspension, spring, or body-mount attachments.
- Group similar corrosion issues so inspection findings can inform preventive maintenance.
- Schedule cleaning and coating only after structural repairs are approved.
- Keep photographs of hidden areas before and after repair.
- Set a reinspection policy based on use and exposure rather than assuming one treatment lasts indefinitely.
For an automotive repair shop or restoration business, outsourced blasting and frame work can be useful when the shop lacks the space, fixturing, dust controls, or specialist equipment for the job. The handoff should include the suspected damage, vehicle history, areas not to blast, target components, and the decision the shop needs answered. “Clean this frame” is less useful than “expose the rear spring hanger and determine whether the rail remains repairable.”
What to ask before authorizing Bent Car Frame Repair
An owner does not need to perform the repair, but should be able to understand the diagnosis. Ask for answers that distinguish appearance from structure:
- Which frame or unibody points were measured?
- What manufacturer specification or repair information governs the measurement?
- Is the damage collision-related, corrosion-related, or both?
- How far does corrosion extend beyond the visible hole or scale?
- Will the repair correct, replace, or reinforce the damaged section?
- How will the opposite side and enclosed cavities be inspected?
- What components attached to the damaged area also need evaluation?
- How will the repair be verified before the vehicle returns to service?
- What corrosion protection will be applied, and how will drainage remain open?
- Which conditions are outside the proposed scope?
A trustworthy recommendation includes a stop point. If inspection reveals widespread perforation, undocumented previous repairs, or structural damage extending into multiple critical areas, the responsible answer may be to pause and compare repair cost, replacement value, and safety risk. That is especially important for older vehicles where a visible frame defect may be only the first discovered problem.
For a Central Massachusetts vehicle that has a repairable structure, the practical recommendation is to expose and measure the damaged area before choosing welding, pulling, or coating. Repair sound metal according to vehicle-specific procedures, verify related suspension and alignment points, then protect the finished work against renewed salt exposure. Bay State Rust Prevention provides rust removal, frame-off sandblasting, automotive frame repair, and WaxOyl-based corrosion protection for vehicles across Worcester and Central Massachusetts; visit baystaterustprevention.com when you need the structural condition assessed before the next coating or restoration step.