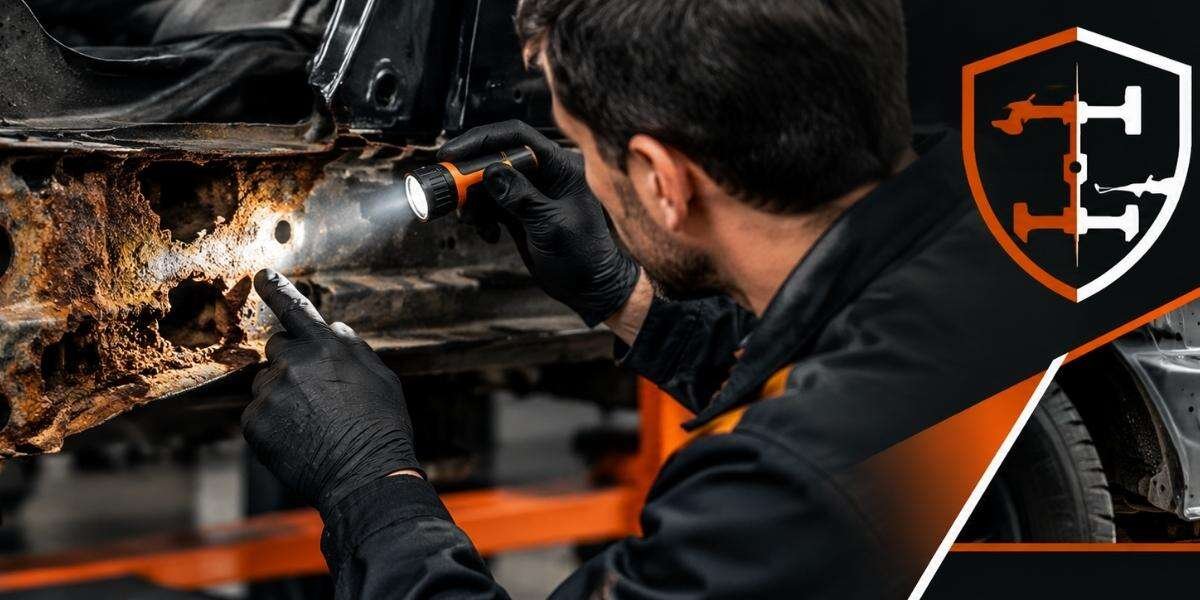
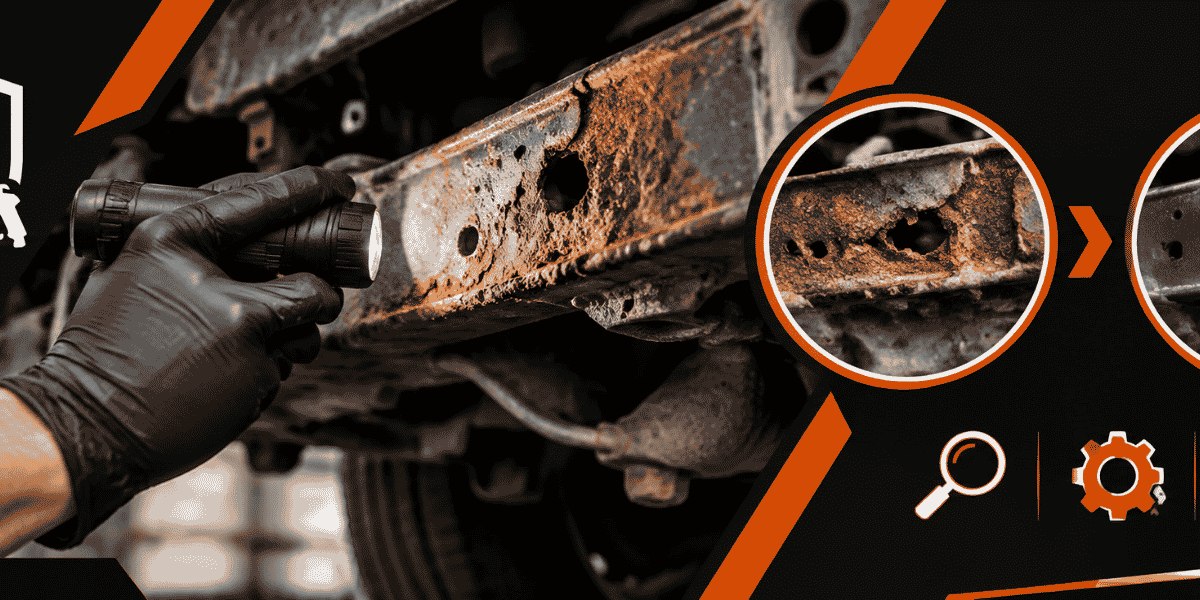
DIY car rust repair can be a reasonable weekend project when corrosion is limited to removable brackets, bolt heads, a small body panel, or lightly scaled metal. The concrete goal is not merely to make rust look better: it is to identify the corrosion mechanism, remove unstable material, protect clean metal, and avoid hiding structural damage that needs professional repair. By the end of this guide, you should be able to sort a salt-exposed vehicle into a safe DIY repair, a monitored condition, or a frame-restoration job.
That distinction matters in Central Massachusetts. A vehicle can look acceptable above the rocker panels while road salt and wet debris work inside seams, crossmembers, brake-line clips, and boxed frame sections. Massachusetts publishes winter-weather response information because snow and ice control is a recurring road-maintenance problem, but the exact exposure varies by route, parking conditions, and how thoroughly the vehicle is washed. See the state’s current winter-weather guidance for context: Mass.gov winter weather response.
Core rule: If you cannot determine whether a rusted area carries suspension, steering, braking, seat-belt, body-mount, or powertrain loads, do not grind, weld, or seal it as a DIY cosmetic repair.
Classify the rust before buying materials
Start with diagnosis, not a shopping trip. Rust is an electrochemical process that needs an anode, a cathode, an electrolyte such as water, and a conductive path. Road salt makes wet contamination more conductive and can keep seams damp longer. Paint bubbling is therefore a symptom, not a complete diagnosis: corrosion may have lifted the coating from behind, trapped moisture between overlapping panels, or entered through a drain path.
Use a three-level inspection
Wash the underside first if possible, let it dry, and use bright lighting. Do not pressure-wash directly into electrical connectors, wheel bearings, or damaged seals. Photograph each affected area before scraping so you can compare what is removed with what remains.
- Surface oxidation: thin orange or brown discoloration with firm metal underneath, no swelling, and no perforation. This is usually a preparation-and-protection job.
- Section loss: deep scale, layered flaking, pinholes, stretched seams, or a soft spot under light probing. This may require cutting and fabricating metal rather than coating it.
- Structural corrosion: holes, torn mounts, separated welds, crushed or buckled frame sections, heavily reduced flanges, or rust around suspension and steering attachments. Stop DIY work and arrange an inspection.
A screwdriver is not a reliable structural test by itself. A sharp pick can reveal a thin skin over a void, but a solid-feeling surface can still conceal corrosion inside a boxed rail. Look at both sides of a rail, follow the rust beyond the visible stain, and compare the left and right sides when the design is symmetrical.
Separate cosmetic panels from load-bearing parts
Quarter panels, fenders, door skins, and some floor sections may be repairable by a capable hobbyist, but the method depends on whether the panel is structural, bonded, spot-welded, or part of a water-management seam. Frame rails, subframes, control-arm mounts, spring seats, seat-belt anchors, and body mounts deserve a different standard.
For a used-car purchase, inspect before money changes hands. Request a lift inspection if the seller permits it, and look for fresh undercoating over inconsistent scale, weld beads that do not match the surrounding factory welds, damp boxed sections, and missing drain plugs. Fresh black coating is not proof of rust repair; it may conceal either a sound preparation job or an unresolved problem.
Vehicle safety is not just a cosmetic issue. NHTSA explains that recalls address unreasonable safety risks and provides a VIN lookup for open recalls; check the vehicle’s recall status separately from your corrosion inspection at NHTSA’s recall lookup page. A recall check will not certify a frame, but it can identify safety work that should be handled before restoration.
Set a safe work boundary and gather the right tools
Once the rust is classified, define what you will and will not do. A sensible DIY boundary is: clean and stabilize accessible non-structural metal, replace simple rusted hardware, repair a removable bracket when its shape and thickness can be accurately reproduced, and stop when the job requires load-path judgment or major welding.
Build a controlled work area
Support the vehicle on rated stands placed at manufacturer-approved points. Chock wheels that remain on the ground, keep a second person away from the vehicle while it is raised, and never rely on a jack as the only support. Remove or shield flammable materials before using heat or sparks. Keep an extinguisher within reach and inspect the opposite side of a panel before grinding.
Abrasive blasting creates more than ordinary dust. OSHA identifies hazards associated with abrasive blasting, including airborne dust, noise, and the possibility of toxic materials in coatings or abrasive media. Its guidance is available at OSHA’s abrasive blasting safety page. For a home garage, that means blasting a complete chassis is generally a poor improvisation: containment, respiratory protection, ventilation, cleanup, and media recovery all matter.
- Safety glasses plus a face shield for wire-wheel and grinding work.
- Hearing protection when using grinders, needle scalers, or air tools.
- A suitable respirator selected for the coating and dust hazard, not just a disposable dust mask.
- Gloves that do not create a snag hazard around rotating tools.
- Wheel chocks, properly rated stands, and a work light with protected wiring.
- Plastic sheeting or a removable work surface for collecting flakes and abrasive debris.
Choose tools for the corrosion layer
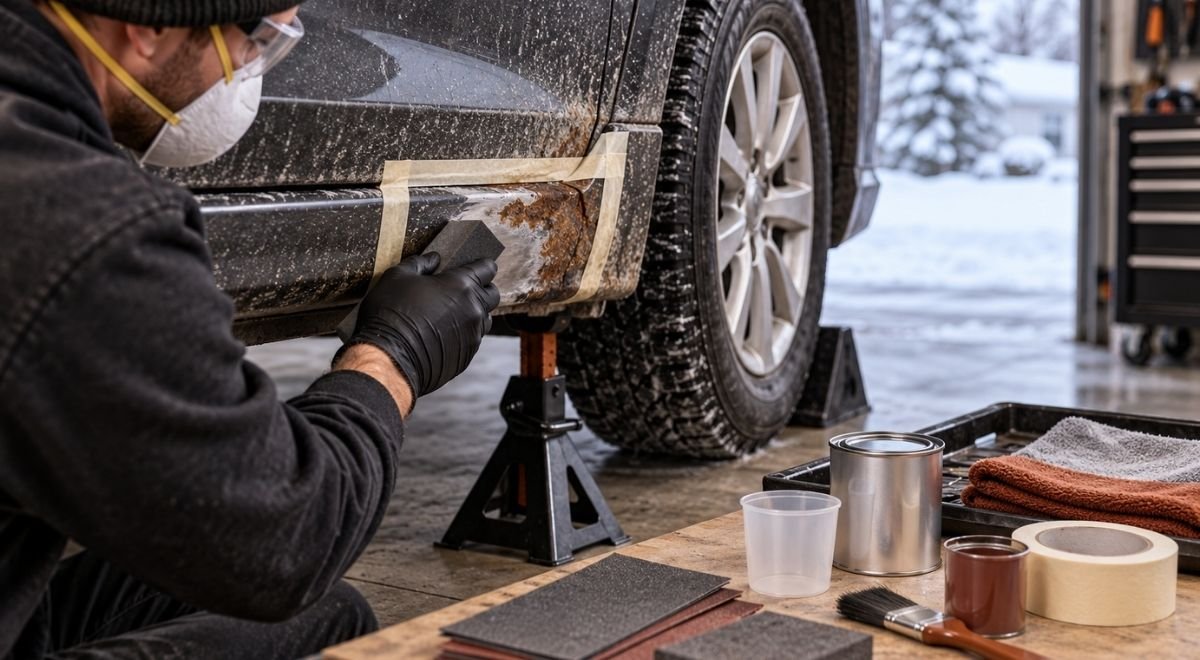
Use a scraper and stiff hand brush to remove loose scale. A wire wheel is useful for cleaning edges and small brackets, but it can polish rust into a deceptively smooth surface and throw wires at high speed. A flap disc removes material more aggressively; use it sparingly because it can thin sound metal and erase factory edges. A needle scaler can break heavy scale on robust, non-precision areas, but it can damage thin sheet metal.
For a small repair, your materials may include solvent cleaner compatible with the coating system, abrasive paper, rust-converting or rust-inhibiting primer selected according to its technical sheet, epoxy or suitable metal primer, seam sealer, cavity protection, and a durable topcoat. Do not mix coating systems casually: a solvent, converter, primer, seam sealer, and underbody coating can fail through poor adhesion even when each product works well by itself.
Read the product’s technical data sheet for surface preparation, recoat window, temperature, humidity, and compatibility. If the label requires mechanically clean metal and you leave layered scale, the coating is being asked to solve a preparation problem it cannot solve.
Remove rust without weakening the repair area
Cleaning is where many DIY repairs go wrong. The objective is not to make every surface shine; it is to remove loose corrosion, expose the true boundary, and preserve enough sound metal for the repair or coating to hold.
Work from the outside of the stain toward sound metal
- Mark the visible rust boundary with removable tape or a paint marker.
- Scrape away loose flakes and vacuum the debris rather than blowing it into seams.
- Brush or mechanically abrade the area until the remaining metal is firm and the transition is stable.
- Probe seams, drain paths, and the reverse side of the panel.
- Wipe with the cleaner specified by the coating manufacturer, then allow the surface to dry fully.
- Reinspect the edge. Expand the repair if new pinholes, lifting scale, or dampness appear.
Rust converter is not a substitute for removing scale. A converter can be useful on tightly adhered oxidation when its instructions allow it, but it cannot restore lost thickness or bridge a hole. Nor should it be applied over oil, salt residue, loose rust, or trapped moisture. If the metal is perforated, the correct repair is usually to remove the weakened section and replace it with properly fitted metal, not to bury the opening beneath filler or rubberized coating.
Worked example: a rusted brake-line retaining bracket
Suppose a pickup has a small steel brake-line bracket with surface scale and one broken fastener, while the frame rail around it is solid. Remove the line only if you can do so without stressing or kinking it; otherwise support the line and work around it. Compare the bracket with an intact example or a parts diagram. If its original shape is clear, fabricate or source a like-for-like bracket, clean the mounting area to firm metal, and use hardware appropriate to the location.
Do not drill into a frame rail merely to replace a corroded clip unless the attachment method is approved for that vehicle and does not weaken the rail. Do not weld near a brake line, fuel line, tank, airbag wiring, or electronic module without understanding heat and electrical risks. If the bracket’s failure is caused by a perforated frame flange, the job has moved from bracket replacement to structural repair.
| Observed condition | DIY action | Stop signal | Protection decision |
|---|---|---|---|
| Firm metal, orange film, no swelling | Clean, abrade, prime, and topcoat | Pinholes or lifting edges appear | Use a compatible coating stack after full drying |
| Heavy scale on a removable bracket | Remove and compare against an intact shape | Thickness or original shape cannot be established | Replace with a correct part or have it fabricated |
| Perforated floor or outer panel | Expose the full boundary; plan a patch only if non-structural | Panel carries a mount, belt, seat, or suspension load | Professional metal repair and corrosion protection |
| Rust at frame, subframe, spring, or control-arm mount | Clean only enough to document the condition | Any section loss, separation, or uncertain load path | Stop coating and obtain a structural inspection |
| Rust inside a boxed rail | Inspect drains and accessible openings | Scale continues internally or drains are blocked | Specialist evaluation, possible section repair or replacement |
The table is an implementation aid, not a substitute for the vehicle manufacturer’s repair information. When the stop signal appears, stop changing the evidence. Grinding away the last visible edge or applying a black coating can make later assessment harder.
Repair metal and restore water management
After cleaning, decide whether the repair needs replacement metal, a fastener, a seam repair, or only a coating system. Body filler is for shaping a properly repaired surface; it is not a structural bridge. Fiberglass or mesh laid over a rust hole can produce a smoother appearance while leaving the weakened metal and moisture path underneath.
Use the original load path and drainage as guides
A patch should extend into sound metal, fit closely, and be attached using a method appropriate to the panel thickness and location. A butt-welded patch can preserve a cleaner contour, while an overlap may be suitable in some non-structural areas if the design allows drainage and the seam is sealed correctly. The wrong overlap creates a capillary pocket that holds saltwater.
Do not seal every hole you see. Some openings are intentional drains or access points. Before applying seam sealer, identify where water enters, where it should exit, and whether the repair has blocked a factory drain. A sealed cavity with residual salt and moisture can corrode faster because it dries poorly.
For structural frame work, repair geometry matters as much as weld appearance. A replacement section must restore alignment, section strength, attachment locations, and load transfer. That is why frame corrosion around suspension or body mounts should be evaluated by a shop that performs automotive frame repair rather than treated as a larger version of a body-panel patch.
Illustrative starting policies for small repairs
The following are illustrative starting policies, not universal thresholds. Adjust them when the vehicle manufacturer’s instructions, the product data sheet, the metal thickness, or the inspection signal points elsewhere:
- Allow a cleaned repair area to dry overnight before sealing it if the garage is cool, humid, or the metal has seams. Adjust longer if condensation returns or the coating label requires more time.
- Inspect a fresh DIY repair after the first few wet drives and again at the end of the first winter. Move the inspection earlier if bubbling, damp seams, or new orange staining appears.
- Expand preparation at least beyond the visibly bubbled paint until the surrounding coating is firmly bonded. The signal to expand farther is lifting, hollow-sounding scale, or a contaminated edge.
- Use a small test area before committing to a full coating system. Stop if the coating wrinkles, stays soft beyond its stated cure window, or can be lifted with light tape.
These policies are intentionally conservative because temperature and humidity change the result. A coating that cures adequately in a warm, dry shop may remain soft in an unheated Massachusetts garage. Follow the label’s limits rather than treating a calendar estimate as proof of cure.
Protect the repaired area against salt and trapped moisture
Protection has two jobs: isolate prepared metal from water and prevent future contamination from remaining in seams or cavities. The right treatment depends on whether the surface is exposed, enclosed, frequently abraded, or subject to heat.
Build a compatible protection stack
A typical non-structural sequence is clean metal, compatible primer, topcoat, seam sealer where required, and a cavity or underbody protectant suited to the location. Keep products off brake friction surfaces, tire contact areas, exhaust components unless specifically rated for heat, and electrical connectors. Mask drain openings and moving joints.
For a vehicle driven through Central Massachusetts winters, a professionally applied rust prevention undercoating can be considered after the underside is inspected and prepared. Undercoating is not a repair for perforated metal, active flaking, blocked drains, or wet contamination. Its value depends on preparation, coverage, adhesion, and the ability to inspect the vehicle later.
Wax-based cavity protection can be useful inside accessible rails, doors, rocker cavities, and seams when the product is appropriate and applied without blocking drainage. A corrosion-protection product such as WaxOyl should be treated as a system component, not as a magic layer that makes heavy scale structurally sound. The application plan should identify where the product goes, where it must not go, and how future inspections will be performed.
Do not pressure-wash a newly coated surface until the product has cured according to its instructions. After winter driving, rinse salt from the underside with attention to wheel wells and ledges, then let the vehicle dry. Washing is maintenance, not a cure: it cannot remove rust hidden inside a closed section or restore steel already lost.
Document what you covered
- Photograph the cleaned metal before primer.
- Record the product name, batch or lot information if available, and application date.
- Mark drain openings, seams, repaired brackets, and areas intentionally left untreated.
- Note any locations that require a lift inspection rather than an at-home visual check.
- Schedule an inspection after the next winter rather than assuming one application ends the process.
Never coat over evidence you still need to evaluate. If a frame rail is scaled, wet inside, or missing material, preserve access for inspection and repair. A neat finish can be the least useful outcome if it conceals a developing structural failure.
Decide when DIY ends and professional frame work begins
The most important skill in DIY rust repair is recognizing an unfavorable job early. A professional does not merely apply a stronger coating; the shop can expose more of the vehicle, compare both sides, measure alignment, remove damaged sections, fabricate reinforcement, weld to an appropriate procedure, and protect the completed repair.
Use these escalation signals
- The rust is within or adjacent to a suspension, steering, brake, seat-belt, body-mount, or engine-mount attachment.
- A frame rail, subframe, crossmember, spring perch, or control-arm mount has perforation or visible section loss.
- The vehicle sits unevenly, pulls, clunks, or shows unusual tire wear after corrosion appears near a load-bearing area.
- You cannot inspect the back side of the metal or determine whether corrosion continues inside a boxed section.
- The repair requires cutting, welding, straightening, or reinforcing a structural member.
- Fuel, brake, air-conditioning, high-voltage, or restraint-system components are close to the work.
- Previous repairs have trapped scale, created irregular welds, or covered the area with thick undercoating.
A complete chassis restoration is a different undertaking from cleaning a rusted bracket. A specialist may recommend disassembly, media blasting in a controlled facility, corrosion mapping, metal replacement, and a documented protection system. For classic vehicles, originality can also change the decision: preserving factory spot-weld patterns, drain paths, and correct-gauge metal may matter more than the fastest visible repair.
Worked example: a salt-damaged work truck
Imagine a 2014 work truck used on treated roads. The owner sees bubbling paint near the rear wheel arch and wants to coat the frame before winter. During inspection, the wheel arch has cosmetic perforation, but the frame has deep scale near a spring hanger and a drain hole is blocked.
The correct sequence is not “spray everything black.” First, photograph and clean enough to reveal the boundaries. Second, keep the frame area uncoated and arrange a structural inspection. Third, repair or replace the affected frame section and spring-hanger area using an appropriate procedure. Fourth, repair the wheel arch separately as a body-panel job. Finally, apply corrosion protection only after the structural work, coatings, drainage, and inspection access are settled.
That order may feel slower, but it prevents an expensive mistake: making a truck appear restored while leaving the load path compromised. The same logic applies to fleet vehicles. Create a repeatable inspection sheet, photograph high-risk points, and escalate any vehicle that crosses the same structural threshold rather than allowing each driver to make a different judgment.
Do this first: perform a dry, documented inspection
Before ordering coating or removing a single frame flake, wash the vehicle’s underside, let it dry, raise it safely, and photograph every rusted area from multiple angles. Mark each location as surface oxidation, section loss, or structural concern. Use the table above to decide whether the job is a controlled DIY preparation project or an inspection-only task.
If the affected metal is limited to accessible, non-structural parts, prepare one small test area and follow the coating manufacturer’s instructions exactly. If rust reaches a frame, subframe, suspension mount, seat-belt anchor, body mount, or boxed section, stop at documentation and arrange professional assessment. For a larger chassis project, Bay State Rust Prevention provides rust removal, frame repair, controlled frame-off rust removal, and WaxOyl-based corrosion protection for vehicle owners, restoration projects, shops, and fleets across Worcester and Central Massachusetts; learn more at baystaterustprevention.com.