
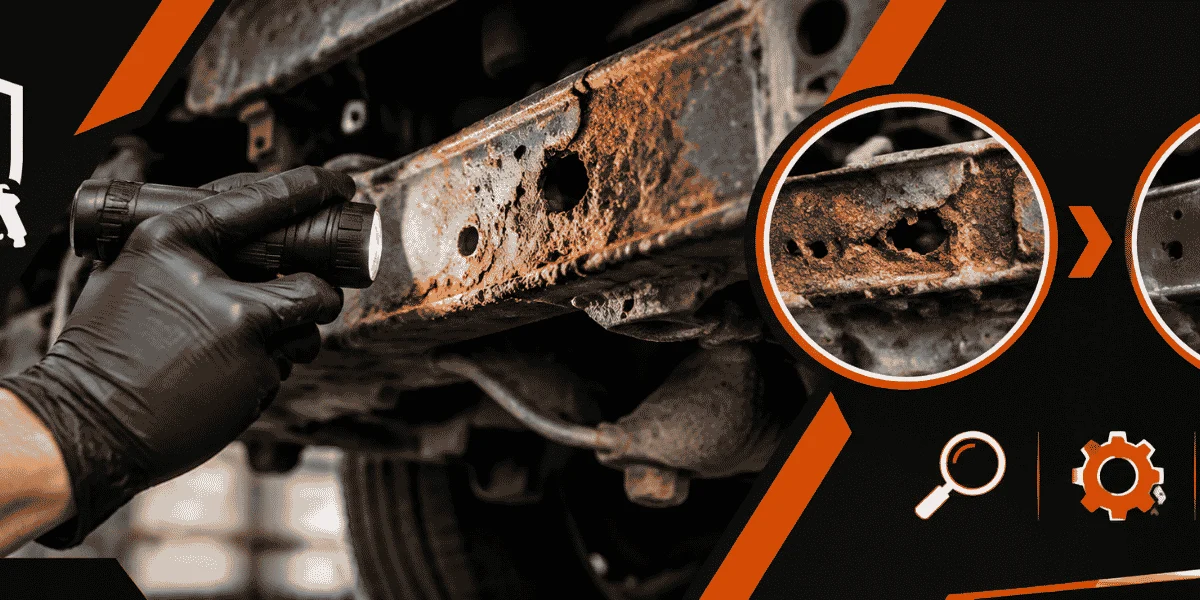
A small rust spot repair on car can stay a cosmetic repair—or become an opening for water, salt, and corrosion beneath the surrounding paint. The practical goal is not simply to make the orange mark disappear. It is to remove unstable corrosion, seal the metal from moisture, restore a durable finish, and recognize when the spot is evidence of a larger structural problem. This guide gives Central Massachusetts vehicle owners a repeatable process for deciding whether a repair belongs in the driveway, a body shop, or a frame-restoration workflow.
Use the procedure for a door edge, fender lip, hatch seam, or isolated stone chip that has begun to rust. Do not use it as permission to grind, weld, or paint over a suspension mount, frame rail, brake-line area, seat-belt anchor, or visibly perforated structural panel. Those locations require inspection before cosmetic work hides useful evidence.
Map the rust before touching the paint
Rust rarely ends exactly where the orange color ends. Moisture can travel behind a paint edge, collect between a folded panel and its reinforcement, or remain inside a seam after the visible surface has been cleaned. Begin by washing the area with automotive soap, rinsing away salt, and allowing it to dry completely. Photograph the spot before sanding, including one wider image that shows its location on the vehicle.
Separate surface corrosion from a perforation
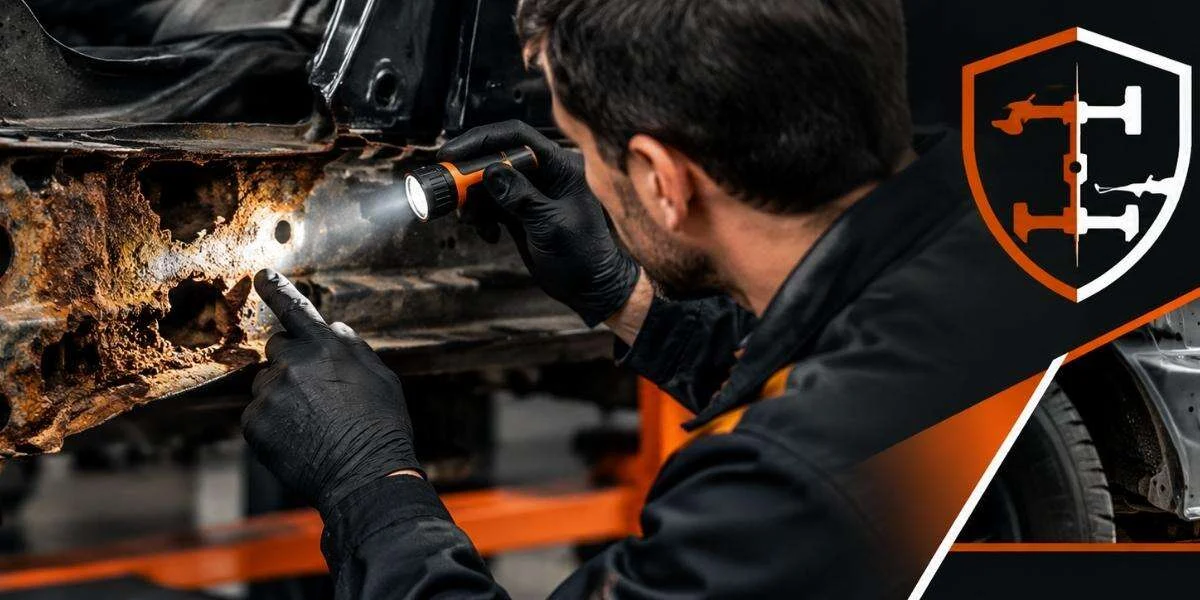
Press the area gently with a plastic pick or the rounded end of a small tool. Avoid stabbing the metal. A firm panel with a thin, rough film is a different job from a panel that flexes, flakes in layers, or reveals a pinhole. Look at the reverse side if access is safe. A fender lip that appears minor outside may have a thick scale buildup between two layers.
- Surface rust: orange or brown discoloration with intact, firm metal underneath.
- Blistering paint: corrosion is growing beneath the coating; the visible spot is usually smaller than the affected area.
- Scaly rust: layered oxide has expanded and may have reduced the metal thickness.
- Perforation: a hole, soft edge, or visible daylight means filler alone is not a sound repair.
- Structural location: rust near a frame, crossmember, spring mount, control-arm mount, or body mount should be escalated before refinishing.
For a used-car buyer, record the same observations on both sides of the vehicle. Matching rust at opposite wheel arches or along both rocker panels suggests an environmental or design-related pattern rather than one isolated chip. For a fleet manager, add the unit number and odometer reading to the photo record so recurring corrosion can be compared across trucks.
| What you observe | Likely job category | Next decision |
|---|---|---|
| Firm metal, shallow discoloration, no bubbling | Cosmetic spot repair | Clean, convert or remove corrosion, prime, paint, and protect |
| Raised paint, rusty seam, or expanding edge | Localized body repair | Remove more surrounding coating and inspect the panel layers |
| Flakes, pinholes, soft metal, or rust on both sides | Panel replacement or metal repair | Obtain a body-repair assessment before filling |
| Rust at a mount, rail, crossmember, or suspension attachment | Potential structural repair | Stop cosmetic work and arrange a structural inspection |
The table is an illustrative starting policy, not a substitute for an inspection. Adjust the decision toward professional evaluation when the metal flexes, the corrosion returns quickly, or you cannot see the back of the panel.
Clean the work area and control the repair boundary
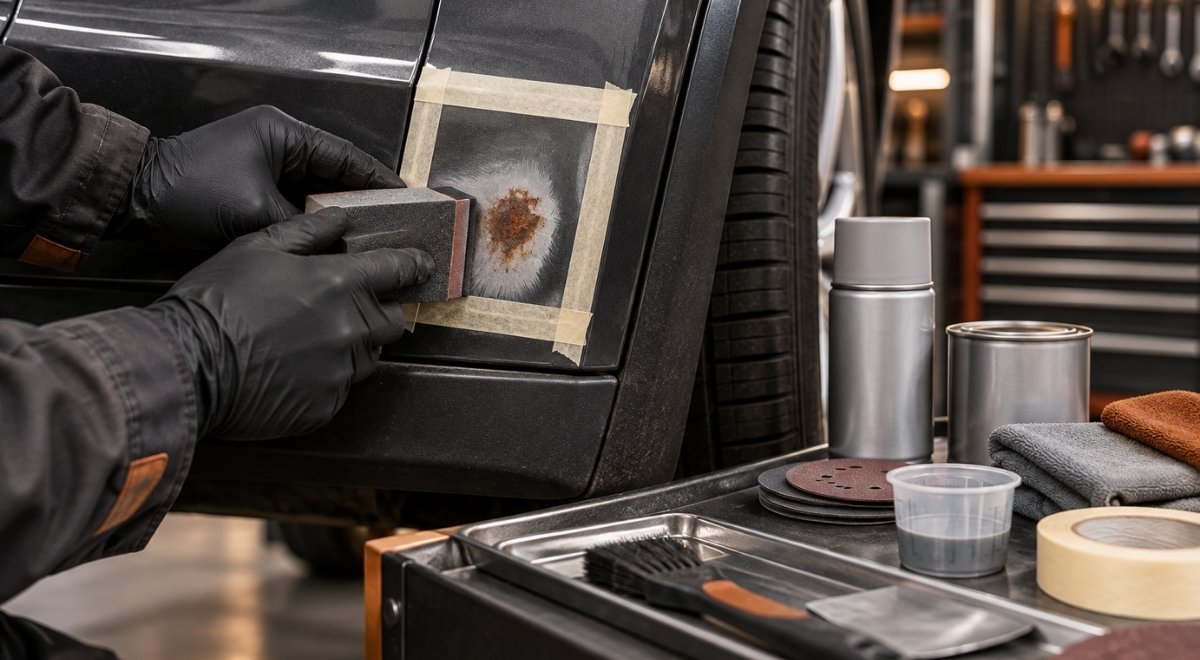
Small repairs fail when sanding begins over road film, wax, silicone, or trapped moisture. Clean a generous area around the defect, not just the orange mark. Rinse thoroughly, dry with clean air or towels, and mask nearby trim, glass, tires, and door gaps. If the spot is on a seam, do not force abrasive dust into the opening where it can remain behind the panel.
Use the least aggressive preparation that exposes sound metal
A hand scraper, abrasive pad, small wire brush, or drill-mounted abrasive tool can remove loose scale. The objective is stable metal at the repair perimeter, not maximum metal removal. Aggressive grinding can thin a wheel arch or create a low area that requires more filler than the original defect.
- Wear eye protection and a suitable respirator for dusty preparation; do not rely on a paper nuisance-dust mask.
- Use hearing protection with powered tools.
- Keep sparks and abrasive dust away from fuel vapors, battery gases, upholstery, and exposed wiring.
- Contain debris with masking, a vacuum rated for the material, or a catch sheet.
- Stop if the panel heats noticeably, begins to distort, or exposes a larger void than expected.
Do not confuse hand preparation of a tiny spot with abrasive blasting of a complete frame or body shell. Blasting creates a much larger dust, rebound, substrate, and waste-control problem. OSHA’s abrasive-blasting requirements address ventilation, protective equipment, and related controls in its general-industry standard; review the applicable requirements before planning blasting work rather than treating it as an oversized version of hand sanding. OSHA’s abrasive-blasting standard is the appropriate starting reference.
For an older truck with thick scale across the rails, professional frame-off rust removal may be more appropriate than attempting to chase isolated orange spots with a drill. The work should expose the entire condition so weakened sections, previous repairs, and inaccessible faces can be evaluated together.
Decide whether to remove, convert, or replace the corroded metal
Rust is a chemical change in the metal, not dirt that can be sealed indefinitely. A converter may be useful where small amounts of tightly adhered corrosion remain in pits, but it cannot restore lost thickness. A filler can level a surface; it cannot replace a weakened flange or make a perforated rocker structurally sound.
Choose the treatment by the remaining metal
- Remove loose corrosion mechanically. Continue until the edge no longer sheds flakes and the surrounding coating has a firm transition.
- Inspect the exposed surface. Pits may remain even after loose oxide is gone. Check whether the metal is uniformly firm and whether the spot has opened.
- Use a compatible rust treatment only as directed. Follow the product’s surface-preparation, drying, and overcoating requirements. Do not assume every converter can be buried beneath every primer.
- Repair lost metal appropriately. A small non-structural pinhole may require a proper metal patch, while a structural section may require engineered cutting, forming, welding, and corrosion protection.
- Recheck the reverse side. If rust remains inside a hem or cavity, exterior paint alone leaves the source in place.
An illustrative starting policy is to treat any perforation, soft spot, or corrosion within roughly a hand’s width of a structural attachment as an escalation point rather than a DIY filler job. That distance is not a safety standard. Adjust it downward when the panel is thin, load-bearing, or inaccessible from behind, and upward only when a qualified inspection confirms the area is cosmetic.
For a classic vehicle, originality changes the decision. A thin original fender may be worth carefully repairing instead of replacing with a reproduction panel, but preserving it does not justify leaving active corrosion between layers. Document the metal before cutting, retain removed sections when provenance matters, and plan cavity protection after welding.
Rebuild the surface without trapping moisture
Once the rusted area is stable, feather the surrounding paint so the repair will not leave a sharp ridge. Use a compatible body filler only where the underlying metal is sound and dry. Keep filler thin enough to follow the panel rather than using it as a substitute for missing metal. Block or sand the repair progressively until the transition cannot be felt with a clean fingertip.
Primer is a system, not a magic rust barrier
Choose primer according to the exposed substrate, the paint system, and the product instructions. Some primers require bare steel; others are intended for prepared, existing finishes. Mixing incompatible layers can cause lifting, wrinkling, poor adhesion, or a repair that looks correct until the next wet season.
- Read the technical data sheet for substrate preparation, recoat window, and sanding requirements.
- Keep the repair dry throughout preparation and priming.
- Do not apply primer over fingerprints, sanding residue, wax, or uncured converter.
- Extend primer slightly beyond the bare-metal area onto properly prepared surrounding paint.
- Allow the coating to cure according to its instructions before wet sanding or topcoating.
Use a guide coat or a low-angle inspection light to find pinholes and sanding scratches. A repair that looks smooth under diffuse garage lighting may show a ring once the topcoat reflects daylight. The practical target is an even substrate with no active rust edge, not merely a color match.
For a leased vehicle, consult the lease-return requirements before choosing a touch-up approach. A technically sound repair can still be visually unacceptable if the color, gloss, texture, or panel blend is poor. For a work truck, prioritize keeping corrosion from advancing, but photograph the area and record the materials used so the next maintenance cycle does not remove a protective layer without replacing it.
Apply color, seam protection, and cavity protection
Topcoat the prepared area in light, controlled passes. Keep the spray or applicator moving, and avoid flooding an edge where solvent can soften the surrounding finish. A small aerosol touch-up may be adequate for a chip-sized defect; a large blistered area or metallic color transition usually needs blending skill and better surface control.
Protect the places paint cannot reach
Many repeat repairs occur because the exposed face was refinished while the reverse side remained wet, salty, or rusty. Wheel-arch lips, door bottoms, hatch seams, rocker cavities, and frame interiors need a protection plan that suits their drainage and access. Do not block drain holes with sealant or undercoating.
- Confirm that seams are dry before applying seam sealer.
- Keep drain paths open at doors, rocker panels, tailgates, and quarter-panel cavities.
- Do not spray a thick coating over loose scale; it can conceal continuing corrosion.
- Use a cavity wand where the product is designed for enclosed sections.
- Inspect overspray risk around brakes, exhaust components, belts, sensors, and tires.
For vehicles exposed to Massachusetts winter salt, a broader rust prevention undercoating plan can make sense after cleaning and inspection. Undercoating is not a substitute for removing loose scale or repairing perforated metal; it is a protective layer applied after the substrate and drainage problems have been addressed.
Wax-based cavity products and protective coatings have different application requirements. Follow the chosen product’s instructions for temperature, surface condition, ventilation, and reinspection. The useful question is not “How thick can I spray it?” but “Can the film remain attached, flexible, inspectable, and clear of drainage and service points?”
Verify the repair and build a corrosion-maintenance record
Do not judge the repair immediately after the final coat. Look again after the finish has cured and after the vehicle has experienced ordinary washing and wet driving. The first inspection should check adhesion, edge lifting, bubbling, sanding scratches, and water held in a seam.
Use a repeatable inspection card
| Inspection item | Pass signal | Adjustment if it fails |
|---|---|---|
| Repair boundary | No loose edge, blister, or visible rust creep | Remove failing coating and investigate beyond the original boundary |
| Panel firmness | Metal remains stable under gentle hand pressure | Escalate for metal-thickness and reverse-side inspection |
| Drainage | Water exits normally from factory drain paths | Clear the path; remove coating that bridges an opening |
| Reverse side | No damp debris, scale, or untreated seam | Clean and protect the cavity or schedule disassembly |
| Finish | Primer and topcoat remain bonded without lifting | Identify incompatible layers, moisture, or inadequate cure |
An illustrative starting policy is to inspect a new spot repair after the first wash, again at the end of the winter season, and at each scheduled oil service. Adjust that interval when the vehicle is driven on salted roads, parked outdoors, washed infrequently, or showing recurring bubbling. A fleet can shorten the interval for plow trucks and spreaders because salt exposure is more intense than ordinary passenger-car use.
Rinse salt from wheel wells, rocker panels, and underbody surfaces, but do not direct high-pressure water into damaged seams or electrical connectors. A clean, dry inspection is more useful than repeatedly applying a coating over mud. Keep before-and-after photographs, the repair date, product names, and the next inspection date. That record helps a buyer distinguish an isolated repair from a pattern of deferred corrosion.
If the vehicle has a safety-related defect or you suspect a manufacturer issue, check the vehicle identification number through the official NHTSA recall lookup. A recall search is not a substitute for examining rust, but it is a sensible separate check before spending money on a repair that may involve a documented safety campaign.
Know when a spot repair must become a larger rust-removal job
The most expensive mistake is making a weak structure look clean. Frame rails, body mounts, suspension pickup points, steering components, and spring hangers carry loads that cosmetic preparation cannot evaluate. Rust scale can also hide previous welds, thin flanges, and cracks. If corrosion is near one of these areas, the first task is access and measurement—not filler, seam sealer, or a heavy black coating.
Escalate when the evidence points below the surface
- The spot returns through fresh paint within a short inspection cycle.
- Rust is visible on both sides of a panel or continues inside a boxed section.
- A screwdriver or pick reveals soft metal around a mount or seam.
- The repair area grows substantially once loose coating is removed.
- There are cracks, distorted brackets, questionable welds, or uneven previous patches.
- You cannot safely support, access, or inspect the vehicle’s underside.
- A fleet vehicle is mission-critical and an unplanned failure would cost more than a scheduled assessment.
For a frame or body shell, a proper sequence may include disassembly, media selection, containment, blasting or mechanical removal, thickness and crack assessment, metal replacement, welding, grinding, primer, cavity treatment, and final protection. The correct media and pressure depend on the substrate and the desired finish; indiscriminate blasting can warp thin panels or erase evidence of the original condition.
A frame-off project also creates a chance to inspect brake lines, fuel lines, bushings, mounts, fasteners, and hidden cavities while access is available. That does not mean replacing every adjacent part automatically. It means separating cosmetic rust from components whose condition affects safe operation and future access.
When disposal is involved, do not sweep contaminated abrasive, paint chips, or chemical residue into ordinary trash without checking the applicable rules. The EPA’s household hazardous-waste guidance explains why leftover automotive products and certain maintenance wastes need careful handling and local disposal decisions; use its household hazardous waste reference as a starting point, then follow your municipality’s requirements.
For Central Massachusetts owners, the practical dividing line is simple: repair a genuinely isolated, non-structural defect when you can expose clean, firm metal and control the coating system. Escalate when rust affects load paths, hidden cavities, repeated seams, or enough area that the original spot is no longer representative of the condition.
What to do first on your vehicle
Start by washing and drying the area, photographing it, and mapping the visible and hidden sides before buying supplies. Then classify it as firm surface corrosion, blistering or layered panel rust, perforation, or possible structural rust. That classification determines whether a careful spot repair is sensible.
If the metal is firm and the defect is genuinely isolated, prepare only until you reach a stable edge, use compatible primer and topcoat, keep drains open, and schedule a reinspection. If the area is soft, perforated, structural, or repeatedly returning, stop cosmetic work and arrange an assessment that can address metal repair and long-term corrosion protection. Bay State Rust Prevention serves Worcester and Central Massachusetts with rust removal, frame repair, undercoating, and restoration support; baystaterustprevention.com is the sensible next step when your small spot reveals a larger frame or underbody problem.