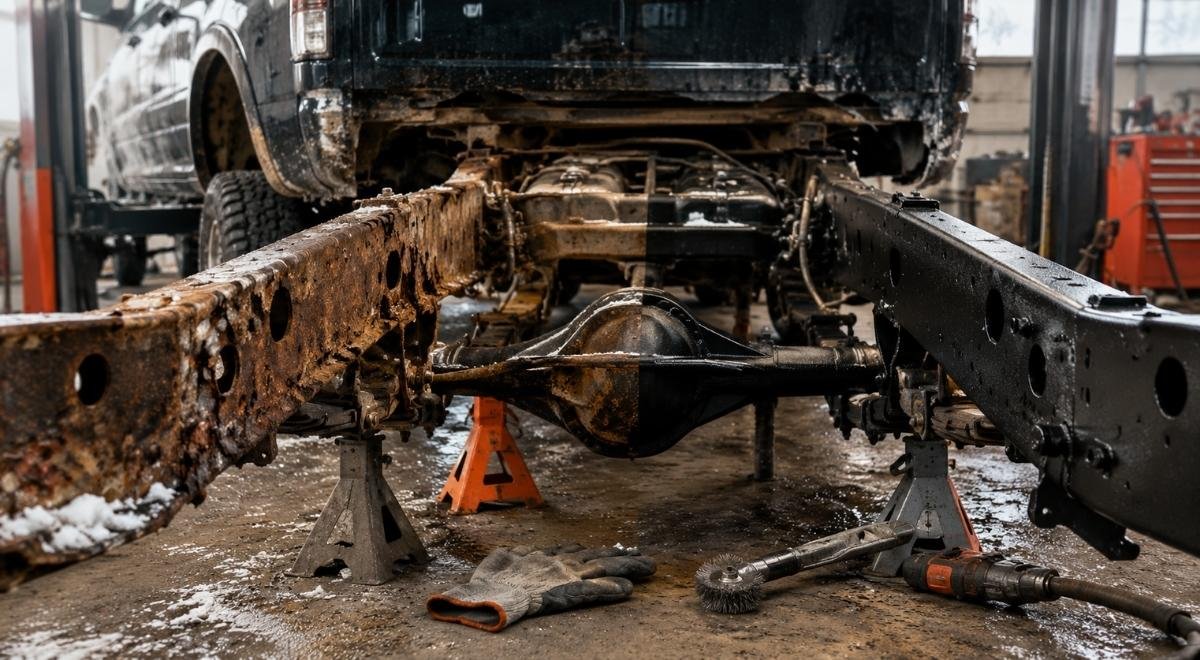
Truck frame rust repair is not a cosmetic touch-up. The frame carries suspension, steering, cab, bed, and sometimes drivetrain loads, so the correct outcome is a documented decision about what can be cleaned and protected, what must be repaired, and what is no longer economical or safe to restore. This guide lays out a practical sequence for a Massachusetts truck owner, used-truck buyer, restoration shop, or fleet manager who needs to move from visible scale to a defensible repair plan.
Road salt makes the problem more persistent because moisture and dissolved salts can remain inside boxed sections, seams, brackets, and overlapping plates after the outside looks dry. The Federal Highway Administration discusses the corrosive effects of deicing materials on transportation infrastructure, which is a useful reminder that salt exposure is not limited to the body panels people notice first. See the FHWA materials on winter maintenance and corrosion for background: FHWA corrosion research.
The sequence matters: clean before judging, inspect from multiple angles, separate surface corrosion from section loss, repair structural defects with appropriate methods, and only then apply a coating. Spraying over loose scale may hide a worsening problem while making later inspection and welding more difficult.
Define the truck’s job and establish a safe starting point
Begin with the vehicle’s actual use, not merely its appearance. A lightly used classic pickup stored indoors has a different risk profile from a three-quarter-ton truck towing in winter, a municipal fleet vehicle, or a daily driver that parks outside near treated roads. The same amount of visible rust can have different consequences depending on payload, towing, suspension modifications, and how often the frame is wet.
Record the exposure and load history
Write down the truck’s year, make, model, drivetrain, mileage, use, storage conditions, and known repairs. Ask whether it has spent winters in Central Massachusetts, whether it has been oil-sprayed or coated before, and whether the body or bed has been replaced. A replacement bed can conceal a frame that was never cleaned beneath its mounting points.
- Photograph both frame rails, crossmembers, spring hangers, shock mounts, steering mounts, and body mounts.
- Record whether the truck is used for towing, plowing, off-road work, or heavy payloads.
- Note any wandering, pulling, clunks, uneven ride height, tire wear, or difficulty aligning the vehicle.
- Identify previous patches, drilled holes, weld beads, crushed sections, and coating layers.
- Keep the vehicle’s inspection records and any repair invoices with the photos.
Do not load the truck to “see if the frame holds.” A sagging body, cracked bracket, or visibly separated weld is a reason to stop normal use and arrange a professional assessment. If a safety defect or recall may be involved, check the vehicle identification number through the official NHTSA recall search at NHTSA.gov. A recall search does not replace a physical inspection, but it can identify an open manufacturer campaign that changes the next step.
For a fleet, create a repeatable intake form. Give every vehicle an ID, capture the same frame locations, and assign a condition category. That lets a fleet manager prioritize trucks by structural risk rather than by whichever vehicle looks worst in a parking lot.
Use a conservative stop-work rule
The following is an illustrative starting policy, not a universal engineering threshold: if you see a cracked suspension or steering mount, a rail that is visibly split, a section with major perforation near a mounting point, or movement between an attached bracket and the rail, take the truck out of service until the area is evaluated. Adjust that policy based on the vehicle manufacturer’s repair information, local inspection requirements, the truck’s load, and the opinion of a qualified frame professional.
Clean and expose the metal before making a repair decision
Inspection through mud, oily residue, and old undercoating is guesswork. The first physical stage is controlled cleaning. Remove loose debris without aggressively grinding the frame before you understand its condition. A grinder can make thin metal look sound by smoothing away the evidence of section loss.
Choose cleaning methods that reveal rather than conceal
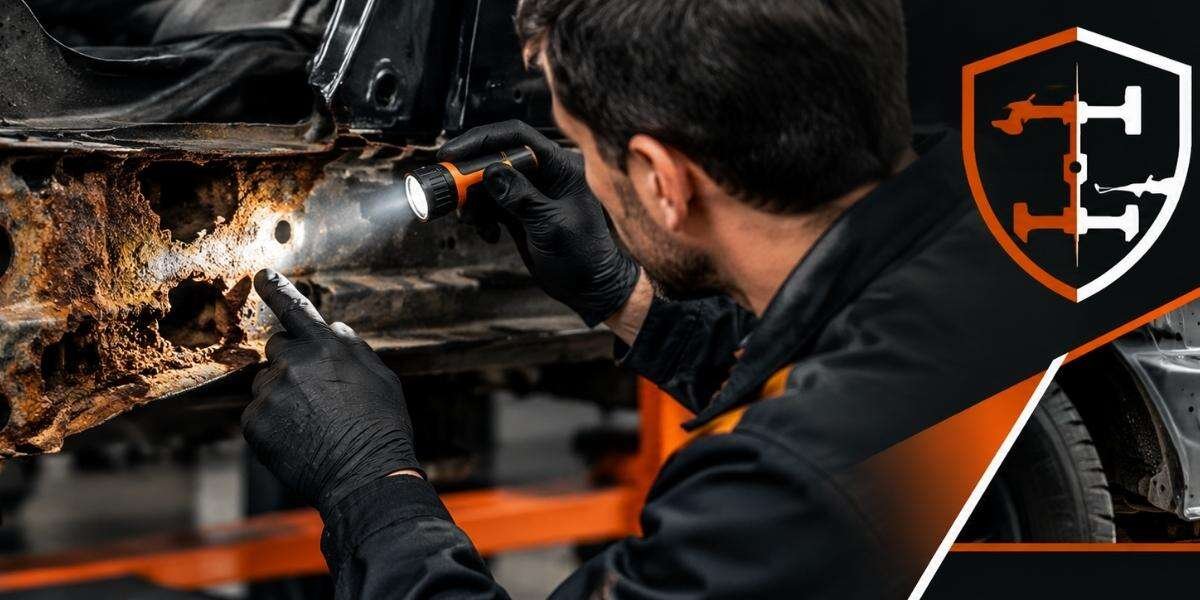
Start with a lift or safe support arrangement that allows access to the top and inside edges of the rails. Use a scraper, appropriate brushes, and a low-pressure wash to remove dirt and salt deposits. Pay special attention to drain holes, spring pockets, body mounts, crossmember junctions, and the areas behind brake and fuel lines.
- Use eye protection, gloves, hearing protection, and suitable respiratory protection for the task.
- Cover sensitive electrical connectors and avoid forcing water into components that are not meant to be washed.
- Allow boxed sections and seams to dry before judging the metal.
- Probe questionable areas with a blunt inspection tool rather than a sharp pick that can create a new puncture.
- Mark findings with removable paint or tape and photograph them before additional cleaning.
Heavy abrasive blasting is a different operation from washing and brushing. OSHA identifies inhalation hazards associated with respirable crystalline silica and provides protective requirements and guidance for abrasive blasting at OSHA’s silica safety resource. That is why frame-off blasting should be performed with suitable containment, media selection, ventilation, and personal protective equipment—not improvised beside an occupied home or active repair bay.
Do not blast blindly around unknown coatings. Older repairs may contain incompatible materials, and classic vehicles may have old paint systems that require additional precautions. The Environmental Protection Agency provides lead-paint information for renovation and repair work at EPA’s lead-safe renovation resource. The practical lesson is to identify the coating and control the dust before choosing an abrasive process.
Map the frame, including hidden surfaces
Divide the frame into zones: front suspension, steering, front rail, cab mounts, center crossmembers, fuel and brake line side, rear suspension, hitch area, and bumper mounts. For each zone, note whether the corrosion is scale, pitting, perforation, deformation, cracking, or a previous repair. A flashlight, inspection mirror, borescope, and thickness measurement can help, but none substitutes for sound judgment about load paths.
As an illustrative starting policy, take photographs at every major mounting location and from four sides of each rail. Increase the documentation if the truck has extensive coating, inaccessible boxed sections, a history of accidents, or a structural modification. The signal to adjust is uncertainty: if you cannot see the metal or explain how a load travels through a questionable area, the inspection is not complete.
Classify corrosion by mechanism and consequence
Not all rust requires the same response. Surface oxidation on a thick, accessible area may be cleaned and protected. Deep pitting reduces the remaining section. Perforation removes material entirely. Crevice corrosion can continue under overlaps, brackets, and old coatings even when the exposed surface looks acceptable.
Use a practical condition scale
| Condition | What it may look like | Decision direction | What changes the decision |
|---|---|---|---|
| Surface scale | Loose flaky rust with sound metal beneath and no meaningful deformation | Clean, verify, prime or coat, and schedule reinspection | Hidden scale, blocked drains, or a nearby mount changes it to a higher concern |
| Deep pitting | Irregular craters, thin edges, or metal that feels weak around a pit field | Measure and assess section loss before coating | Location near a suspension, steering, cab, or hitch load path raises urgency |
| Perforation | Holes, open seams, missing lips, or daylight through a rail or bracket | Engineer or frame specialist determines cut-and-repair or component replacement | Multiple adjacent holes, distortion, or prior patches may make replacement preferable |
| Cracking or separation | Cracked weld, split bracket, detached mount, or rail movement | Stop normal use and arrange structural evaluation | Load, towing, accident history, and manufacturer repair limits govern the remedy |
| Previous patch | Added plate, weld bead, or coating obscuring the original frame | Expose enough surrounding metal to inspect the repair and its edges | Patch termination, trapped moisture, distortion, or poor weld access may require rework |
Location matters more than appearance. A small defect beside a spring hanger may deserve more attention than a broad patch of surface rust in the middle of a straight rail. Suspension and steering forces enter the frame through brackets and crossmembers; corrosion at those transitions can affect alignment, fatigue resistance, and the way loads are distributed.
Do not rely on a single thickness reading. A probe can land on a good ridge beside a deeply corroded valley, and a coated surface can produce misleading results. Compare questionable metal with a clean, similar section of the same rail, inspect both sides, and document the measurement method. The goal is not to produce a false number of certainty; it is to decide whether the remaining structure can be repaired responsibly.
Worked example: a winter-used pickup
Consider a 2014 four-wheel-drive pickup used for commuting and occasional towing in Central Massachusetts. The owner sees bubbling under an old black coating near the rear spring hanger. Cleaning reveals surface scale on the outside, but the hanger-to-rail seam contains deep pitting and a small open edge. The nearby crossmember has intact metal, and there is no visible rail deformation.
A weak plan would scrape the bubble, brush on a converter, and spray the entire underside. A stronger plan records the defect, removes enough coating to establish the full boundary, checks the hanger and both rail faces, and has the structural area evaluated before coating. If sound metal surrounds a localized defect, a properly designed repair may be possible. If corrosion extends behind the hanger or the rail has lost substantial section, replacing or rebuilding the affected structure may be safer than adding a cosmetic plate.
Choose repair, replacement, or preservation
Once the frame is exposed and classified, choose the least aggressive option that restores a sound load path. “Least aggressive” does not mean cheapest or fastest. It means avoiding unnecessary cutting while refusing to preserve metal that can no longer perform its function.
Know when preservation is appropriate
Preservation is reasonable when the metal is structurally sound, the corrosion is accessible, and the coating system can bond to a properly prepared surface. Cleaning must remove loose scale, salts, grease, and failed coating. A rust converter is not a substitute for removing thick flaky corrosion, and a waxy coating is not a substitute for repairing a cracked mount.
Never use coating to bridge a structural defect. Coatings can slow moisture and oxygen access, but they do not restore lost thickness, reconnect a separated bracket, or correct a bent rail. Ask the person performing the work to identify which areas are being preserved and which are being repaired, rather than treating the entire underside as one condition.
Understand repair limitations
A localized cut-and-repair may be suitable when the defect is clearly bounded and the replacement material, geometry, access, and weld sequence are appropriate. The repair must account for how forces enter the rail and where a new plate ends. A patch that terminates abruptly beside a high-stress mount can create a new concentration of stress, while a patch over rust leaves contamination and weak metal trapped underneath.
Component replacement can make more sense when a crossmember, bracket, hanger, or section of rail is widely compromised. The decision depends on the truck’s construction, available repair information, access, alignment, and the condition of adjacent metal. A frame specialist should also check whether the corrosion is symmetrical or whether a hidden area has been weakened on the opposite side.
For trucks with serious damage, obtain a written scope that identifies:
- The areas to be removed, repaired, or replaced.
- How the vehicle will be supported and kept aligned during the work.
- What adjacent components must be removed for access.
- How weld areas will be prepared and protected afterward.
- Which areas remain inaccessible and how they will be monitored.
For a classic or specialty vehicle, preserving original components may matter, but originality should not override structural integrity. Photograph the frame before disassembly, label removed parts, and separate historically important surface details from areas that must be rebuilt for safe operation.
Prepare the repair area and control heat, contamination, and access
Good structural work depends on preparation. Rust, oil, old undercoating, seam sealer, and moisture can contaminate a repair area. Heat can damage nearby lines, wiring, bushings, fuel-system components, and coatings. Supporting a truck incorrectly can also change the frame’s position while a bracket is removed.
Plan the work zone before cutting or welding
Remove or shield combustible materials and identify the routing of fuel, brake, hydraulic, electrical, and emissions components. Confirm whether the battery and sensitive modules require disconnection under the vehicle’s service information. Provide a fire watch and suitable extinguishing equipment according to the shop’s safety procedures.
- Expose clean, sound metal beyond the visible rust boundary.
- Verify the repair dimensions against manufacturer information when available.
- Support the vehicle at approved points and preserve alignment references.
- Protect lines, hoses, bushings, wiring, and fuel-system parts from heat and sparks.
- Pause if removing one bracket reveals more corrosion than the original inspection showed.
Access is a structural issue, not merely a convenience. If a welder cannot see and reach the joint correctly, the repair quality becomes uncertain. Removing a bed, tank, exhaust component, or suspension part may increase the scope, but it can also expose the metal needed for a proper repair and reduce the chance of trapping corrosion between layers.
Do not apply wax, oil, converter, or thick undercoating near a planned weld. Coating contamination can create fumes, porosity, poor adhesion, or a fire hazard. Finish structural work first, allow the area to cool and be cleaned, then apply the protection system specified for the prepared surface.
Use inspection hold points
Create hold points where work stops for a decision:
- After cleaning, confirm the full corrosion boundary.
- After cutting or removing a component, inspect the newly exposed metal.
- Before closing a boxed section, photograph and inspect the interior as far as practical.
- After structural repair, verify bracket position, clearances, and moving-component travel.
- Before coating, confirm that the surface is dry, clean, and free of loose scale.
These are illustrative starting policies, not universal certification requirements. Add hold points when the truck is used for towing, carries commercial loads, has a modified suspension, or contains extensive inaccessible boxed sections. The signal to increase controls is consequence: the more a failure could affect steering, suspension, or public safety, the less acceptable an undocumented repair becomes.
Protect the repaired frame and make future inspection possible
After structural work, protection should address the frame’s actual moisture traps. A durable system usually depends more on preparation and coverage than on the label of a single product. Seams, overlaps, drain holes, bracket backs, and the top surfaces of rails deserve as much attention as the visible lower edge.
Bay State Rust Prevention uses WaxOyl for corrosion protection. For owners considering rust prevention undercoating, the important questions are whether the surface is clean and dry, whether the product suits the existing coating, and whether future inspection points will remain visible. A heavy coating that seals over loose rust or blocks drainage can make later diagnosis harder.
Preserve drainage and inspection access
- Keep factory drain holes open and verify that water can leave boxed sections.
- Do not fill access holes, fasteners, or inspection points with an incompatible material.
- Mask friction surfaces, exhaust components, brake friction material, and electrical contacts.
- Apply protection to seams and backsides without burying cracks or weld defects.
- Photograph the finished frame and mark repaired areas in the service record.
Use a coating compatible with the prepared surface and the vehicle’s intended use. Some owners prefer a penetrant or wax-like material that can creep into seams; others may need a different system for exposed areas subject to abrasion. The trade-off is important: a softer material may be easier to renew and inspect, while a tougher film may resist abrasion but require more careful surface preparation and removal later.
As an illustrative starting policy, schedule a visual underside review after the first winter and then annually for a daily Massachusetts truck. Adjust the interval sooner when the truck plows, travels on salted roads frequently, parks outdoors, or has newly repaired seams. The signal to shorten the interval is renewed bubbling, damp debris, blocked drainage, coating separation, or salt accumulation behind brackets—not merely the calendar.
Rinse the underside when practical after salt exposure, but do not assume washing removes the need for inspection. Water can move salt deeper into seams if the vehicle cannot dry, and high-pressure spray can force contamination into connectors or seals. The useful routine is rinse, dry when possible, inspect known trouble spots, and renew protection when the system has worn or separated.
Verify the result and maintain a corrosion record
The final stage is verification. A truck is not finished when the frame is black. It is finished when the repair scope is documented, the structural areas are accessible for review, the vehicle operates without new interference, and the protection system has a maintenance plan.
Use a handoff checklist
- Compare completed work with the original corrosion map.
- Confirm that repaired brackets, lines, shields, exhaust parts, and suspension components are correctly routed and secured.
- Check that no drain holes or inspection openings were blocked.
- Look for coating on brake friction surfaces, tires, exhaust heat shields, or electrical connectors.
- Photograph repaired areas from the same angles used at intake.
- Record the date, materials, inaccessible areas, and recommended reinspection conditions.
- Arrange any required alignment, road test, or manufacturer-specific inspection.
Keep before-and-after evidence. It helps a private owner evaluate future changes, gives a fleet manager a basis for scheduling, and helps a restoration shop explain why a repair expanded after cleaning. For a used-truck buyer, the record is also more useful than a seller’s statement that the underside was “undercoated.” Ask what was removed, what was repaired, what remains hidden, and when the frame should be checked again.
For fleet operations, use a simple decision table in the maintenance system. The following is an illustrative starting policy; adjust categories to the fleet’s load requirements, inspection rules, and failure consequences.
| Condition code | Action | Review trigger |
|---|---|---|
| A: sound and protected | Continue washing and scheduled visual inspection | Winter use, coating damage, or new trapped debris |
| B: surface corrosion | Clean, prepare, protect, and photograph | Scale returns, drains block, or pitting increases |
| C: localized section loss | Obtain a structural repair scope before coating | Defect spreads beyond the mapped boundary |
| D: mount, crack, or major perforation | Restrict use pending qualified evaluation | Any movement, alignment change, or load-related symptom |
The categories are management tools, not engineering approvals. A truck may need to move from B to D because of location, even if the visible area is small. Likewise, a large area of superficial scale may remain a preservation job if the underlying metal is sound and all load-bearing connections are intact.
What to do first in 2026
Start by washing and photographing the frame without covering anything new. Record the truck’s winter use, towing or payload demands, prior repairs, and every symptom involving steering, suspension, alignment, or unusual movement. Then arrange a qualified inspection of the cleaned frame, especially around spring hangers, steering mounts, cab mounts, crossmembers, and hitch attachments.
Do not purchase a coating as the first response to a bubbling black surface. First determine whether the truck needs preservation, localized structural repair, component replacement, or more extensive frame-off rust removal. Ask for a written scope that distinguishes cleaned metal from repaired metal and states which areas remain inaccessible.
For Central Massachusetts owners, Bay State Rust Prevention can help evaluate and address rust-damaged frames through corrosion removal, structural frame repair, frame-off sandblasting, and WaxOyl protection. Visit baystaterustprevention.com to discuss the truck’s condition and the appropriate next inspection or repair step.