
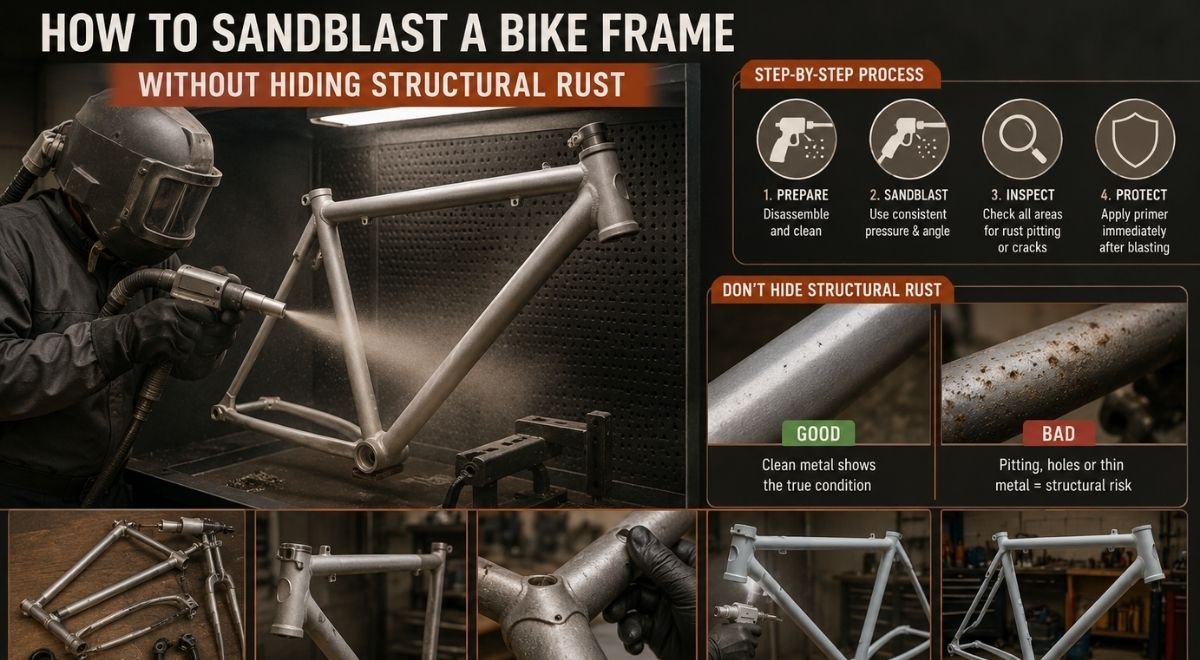
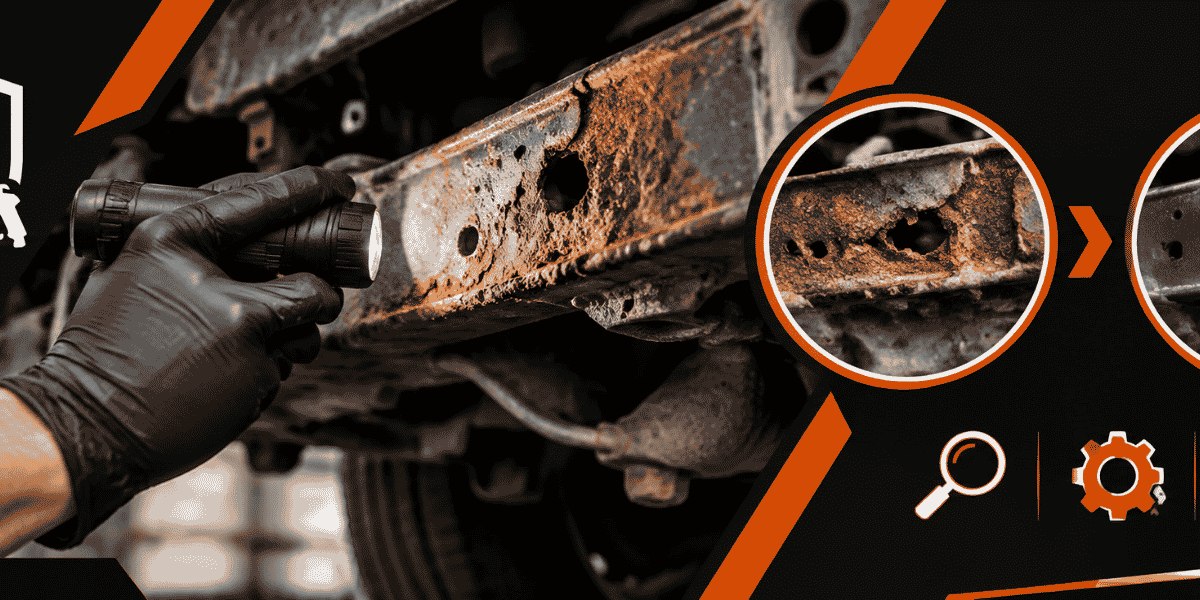
If you plan to sandblast a bike frame, the goal is not simply to make old paint disappear. The useful outcome is a clean, inspectable frame with sound metal, no trapped blasting residue, and a coating plan suited to the frame material. This guide walks a Central Massachusetts vehicle or bicycle restorer through the job in order, including when blasting is the wrong choice, how to document damage, and how to move from bare metal to corrosion protection before humidity or road salt starts the process again.
A bicycle frame is smaller than an automotive chassis, but it is not automatically an easier project. Thin tubing, brazed or welded joints, threaded fittings, internal cable guides, and hidden corrosion all punish careless preparation. If the frame belongs to a valuable vintage bicycle, a custom build, or a customer’s restoration, treat blasting as a controlled inspection stage rather than an aggressive cleaning shortcut.
Decide whether the frame should be blasted
Begin with the frame material, finish, construction, and intended result. Most steel frames can tolerate carefully controlled abrasive preparation, but that does not mean every steel frame should be blasted with the same media or pressure. Aluminum can be marked or distorted by excessive aggression, while carbon-fiber structures should not be treated as though they were steel tubing. If you cannot identify the material or construction, pause and get an experienced assessment before putting it in a blast cabinet.
Make the material and damage decision first
- Steel frame: blasting may be appropriate for failed paint, surface rust, and corrosion around joints, provided the operator can control the media and inspect the tubing afterward.
- Aluminum frame: use a conservative process and confirm that the chosen media is compatible with the alloy, welds, and desired finish.
- Carbon-fiber frame: do not blast it as a metal restoration project. Look for delamination, impact damage, soft spots, or exposed fibers and refer the frame to a specialist.
- Plated or historically finished frame: document the existing finish before removal. Original decals, pinstriping, lug lining, and plating may be worth preserving.
- Heavily dented or cracked frame: do not use blasting to “see what happens.” Photograph it and obtain a structural opinion before removing evidence around the defect.
Look especially closely at the underside of the bottom bracket shell, chainstays, seat cluster, dropouts, rack mounts, brake bridges, and the area beneath cable stops. Road salt and wet grit collect in these locations. On a bicycle used in Worcester or elsewhere in Central Massachusetts, a frame that looks acceptable above the top tube can still have serious corrosion at the bottom bracket or rear stays.
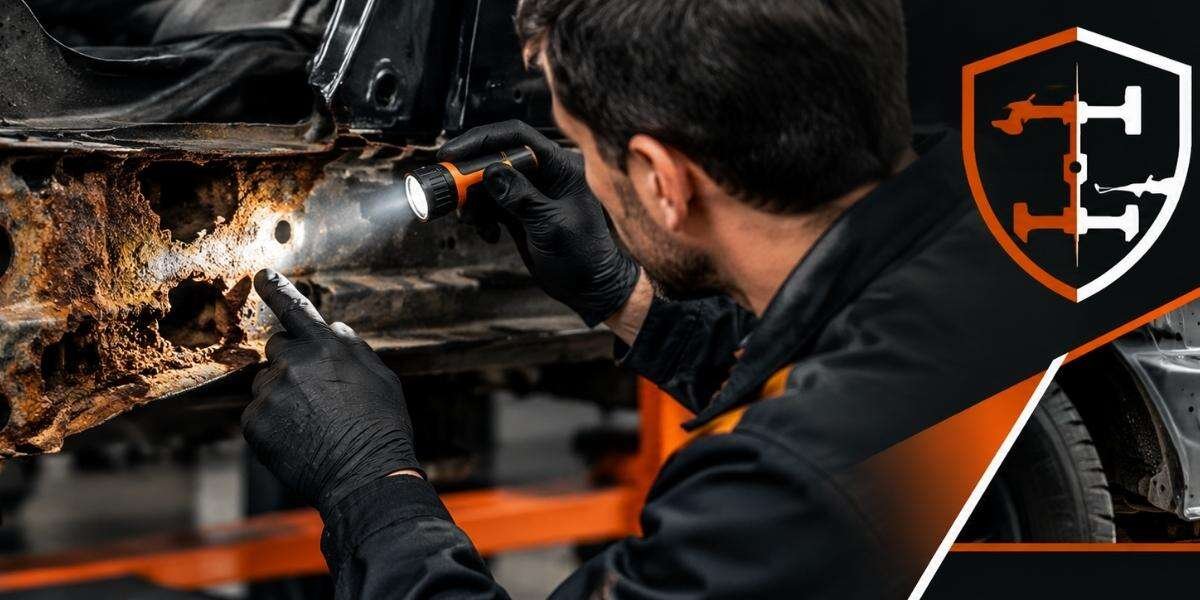
Separate cosmetic rust from section loss. Orange staining and lifting paint may only require cleaning and coating. Pinholes, deep pitting, split seams, swollen tubing, and rust scale that flakes away under light probing are different problems. A coating can hide those defects; it cannot restore missing metal.
Use a stop-work rule for uncertainty
An illustrative starting policy is to stop and obtain a frame-repair assessment whenever you see a crack, a hole, a visibly thinned tube, a distorted dropout, or corrosion that extends around a joint. That is a starting policy, not a universal engineering threshold. Adjust it toward greater caution when the frame is load-bearing, historically valuable, made from unknown tubing, or intended for hard riding. The signal to change the policy is not the amount of surface rust; it is uncertainty about remaining wall strength.
For a commuter bicycle that will return to salted roads, plan the final finish before you blast. For a show bicycle, the priority may be preserving lug detail and achieving a smooth paint base. For a frame headed to a repair shop, the priority is exposing every defect so repair decisions are made on bare, visible metal.
Strip and document every part before blasting
Blasting a complete bicycle frame is a reliable way to damage parts that should have been removed. Take off the fork, headset, bottom bracket, crank, derailleurs, cable guides that are removable, bottle bosses’ hardware, rack hardware, reflectors, decals, and any fittings that can trap media. Keep small parts in labeled bags rather than assuming you will remember where each washer belongs.
Build a condition record
Take photographs from both sides, from the bottom bracket area, and from every joint before disassembly. Add close-ups of serial numbers, paint chips, dents, brazed fittings, and unusual hardware. Measure or record saddle height, cable routing, dropout spacing, and accessory locations if the bicycle will be rebuilt. The photos are useful when old paint has been removed and several similar-looking holes or tabs become difficult to identify.
| Area to record | What to note before blasting | Decision it supports |
|---|---|---|
| Bottom bracket shell | Threads, drain holes, dents, rust scale, shell alignment | Whether to protect threads and request alignment or repair work |
| Head tube and fork crown | Cracks, impact marks, lug gaps, bearing surfaces | Whether blasting should wait for structural inspection |
| Dropouts | Slot shape, hanger alignment, plating, axle contact faces | Which surfaces must remain masked and undamaged |
| Seat cluster and stays | Rust at the joint, clamp marks, brazed or welded fittings | Whether corrosion is localized or running through a joint |
| Cable stops and bosses | Loose fittings, blocked openings, missing hardware | How to plug openings and preserve reassembly references |
Use sacrificial plugs or appropriate masking for threaded areas, bearing seats, brake bosses, drain holes, and precision contact faces. The specific masking material depends on the blasting system and media. Do not seal a cavity without considering how trapped media will be removed afterward. A plug that prevents blast entry but makes inspection or cleaning impossible simply moves the problem.
- Remove grease and chain lubricant before abrasive work.
- Mark left and right components where orientation is not obvious.
- Record the frame serial number separately from the work order.
- Inspect the inside of tubes if access is available.
- Decide whether decals will be photographed, preserved, or discarded.
- Keep a container for removed media-contaminated hardware.
Old coatings deserve special attention. If the bicycle is old enough that the paint composition is unknown, do not sand, blow, or sweep the coating casually. The U.S. Environmental Protection Agency explains that renovation activities involving lead-based paint can create hazardous dust and require lead-safe work practices in covered situations; review its current guidance before disturbing an older finish: EPA’s Lead-Safe Renovation, Repair and Painting Program. The correct response to suspected hazardous coating is controlled containment and proper disposal, not simply a stronger blast.
Set up containment, air, and personal protection
Abrasive blasting turns paint, rust, and blast media into airborne dust. The visible cloud is not the only concern: fine particles can remain suspended, settle on nearby vehicles, enter bearings, and contaminate a shop for the next job. OSHA’s abrasive-blasting requirements address issues such as ventilation, respiratory protection, protective clothing, and control of the blasting operation; review the applicable requirements in OSHA’s 29 CFR 1910.94 abrasive-blasting standard.
Do not improvise the breathing protection
A disposable dust mask is not automatically adequate for abrasive blasting. NIOSH discusses the respiratory hazards of abrasive blasting and the need for an appropriate respiratory protection program in its Protecting Workers from the Hazards of Abrasive Blasting guidance. Select equipment based on the media, coating, enclosure, exposure assessment, and applicable workplace requirements. If the work is being done for a business, the employer’s safety program and applicable regulations control the process.
Set up the frame so it can be rotated without placing hands near the nozzle path. Use a stable hanging fixture or padded support that does not cover the areas you need to inspect. Keep the compressor, hoses, and air treatment system appropriate for the blast equipment. Moisture in the air supply can change the media behavior, interrupt the finish, and contribute to flash rust once the steel is exposed.
- Containment: prevent dust and spent media from reaching occupied work areas, drains, soil, or nearby vehicles.
- Ventilation: move contaminated air through an appropriate collection system rather than toward another worker.
- Hearing protection: use it for the operator and anyone near the blasting operation.
- Skin and eye protection: cover exposed skin and use equipment designed for abrasive-blast rebound.
- Housekeeping: collect spent media with a method that does not create a second dust cloud.
Never point compressed air at your clothing, skin, or another person to remove grit. Do not use an open driveway as a casual blast area when paint chips and spent abrasive can spread into neighboring property or stormwater. The EPA provides general guidance on identifying and managing household hazardous waste at its household hazardous waste resource; use local Central Massachusetts disposal guidance for the actual waste stream, especially when old paint or contaminated media is involved.
Illustrative starting policy: treat all unknown old coatings as potentially hazardous until identified, and keep the work zone isolated from unrelated work. That is not a legal determination. Adjust the policy when coating records, testing, or a qualified safety professional establish a different hazard profile.
Choose media and blast the frame in controlled passes
Media selection controls how quickly the coating comes off, how much profile is left in the metal, and how easily the frame can be cleaned. There is no single “best” abrasive for every bike frame. A hard, aggressive medium may remove heavy scale quickly but can roughen thin tubing and soften crisp lug details. A gentler medium may take longer while giving the painter a better surface to evaluate.
Start with a test area
Choose a hidden section near the underside of a stay or another non-critical area. Test the planned media and settings for a short pass. Examine whether the coating lifts cleanly, whether the metal develops an unnecessarily coarse profile, and whether old filler or brazing is being eroded. Move to a more conservative setting if the test reveals gouging, excessive heat, or loss of detail.
An illustrative starting policy is to use short passes, keep the nozzle moving, and inspect after each pass rather than holding the stream on one spot. This is a process rule, not a universal pressure or distance specification. Adjust it when the frame’s tubing is thinner than expected, the media cuts too aggressively, the metal warms noticeably, or a joint begins losing visible definition.
Work methodically:
- Blow or brush loose dirt away only inside the controlled work area.
- Blast broad, accessible surfaces first so the overall coating condition becomes visible.
- Approach joints, bosses, threads, and stamped details with less aggression.
- Rotate the frame and repeat the inspection from every angle.
- Stop when the sound coating is removed and the metal is clean enough to evaluate; do not keep blasting solely to make every surface look identical.
Do not chase every dark mark automatically. A dark, tight stain in a pit may be residual oxidation that needs additional cleaning, while a shiny crater can be evidence of lost metal. Around a brazed joint, uneven color may reflect the construction rather than corrosion. The decision after blasting should be based on texture, depth, continuity, and location—not color alone.
For a frame with heavy scale, a staged approach can be safer: mechanically remove loose scale, blast the remaining coating under controlled conditions, then perform a close inspection. For a thin-walled vintage frame, aggressive removal may create a worse result than leaving a small amount of stable coating for a specialist to address. The objective is usable inspection, not maximum abrasion.
Inspect bare metal and decide between repair, clean-up, or rejection
Once the coating is removed, clean the frame sufficiently to see the metal without burying the evidence under oil or primer. Use bright, angled lighting. Rotate the frame slowly and examine each tube-to-joint transition. Pay particular attention to the underside of tubes, where corrosion can progress unseen, and to areas where water can remain trapped.
Classify each defect before touching it
- Surface oxidation: discoloration or light rust without meaningful pitting; usually a cleaning and protection issue.
- Localized pitting: small depressions that require depth and remaining-wall assessment before filling or coating.
- Perforation: a hole or open section; this is a repair decision, not a paint-preparation step.
- Crack or split: a structural concern that should be evaluated before further handling or use.
- Deformation: a bent tube, dropout, fork, or shell that may require alignment equipment and dimensional checks.
- Contaminated cavity: trapped media, moisture, or rust scale inside a tube or shell.
Use a blunt pick only to identify loose scale or an opening; do not gouge sound metal to prove that it is sound. Check whether drain holes are open. Shake and rotate the frame in a controlled area to dislodge trapped abrasive, then inspect again. Threaded shells and bearing seats may need separate cleaning and a mechanic’s inspection before assembly.
Illustrative starting policy: mark every defect on the pre-work photograph or a simple frame sketch, and require a second inspection after cleaning. Adjust that policy upward for a rare frame, a customer-owned restoration, or any bicycle that will carry a rider at speed. The signal for more inspection is a defect near a joint or load path, not merely a large area of cosmetic rust.
Worked example: a salted steel commuter frame
Consider a steel commuter frame from Central Massachusetts with bubbling paint on the chainstays and orange staining below the bottom bracket. Before blasting, the restorer photographs the frame, removes the drivetrain and headset, plugs the shell and bearing seats, and records a dent on the right chainstay.
A conservative test pass removes the loose coating without rounding the stay’s stamped detail. After full preparation, the bottom bracket area shows tight pitting but no perforation. The dent remains visible and is not mistaken for corrosion. The owner chooses repair assessment for the dent, cleaning and corrosion treatment for the pitting, and a new protective finish after the repair decision. The frame is not returned to service merely because it now looks clean.
That example illustrates the important sequence: strip, expose, classify, repair, then coat. If the restorer had filled the pitting or primed the frame immediately, the dent and the condition around the shell would have been harder to evaluate.
Clean, protect, and plan the rebuild
Bare steel can begin oxidizing quickly when exposed to humid air, especially after abrasive work has increased the number of clean metal surfaces. Remove spent media from the frame, threads, shell, bosses, and cavities before applying any coating. Pay attention to seams and internal passages; trapped abrasive can later migrate into bearings, cable housings, or the new finish.
Use a cleaning method compatible with the selected primer or coating. Residue from degreaser, fingerprints, moisture, and abrasive dust can interfere with adhesion. Follow the coating manufacturer’s technical instructions for surface condition, recoat window, temperature, ventilation, and compatibility. Do not assume that a product intended for an automotive underbody is automatically suitable for a bicycle frame’s visible surfaces, threaded areas, or moving interfaces.
Match the protection to the bicycle’s next life
- Paint restoration: use a primer and topcoat system selected for the cleaned substrate and the intended appearance.
- Powder-coat preparation: confirm that all heat-sensitive parts, trapped contaminants, and threaded surfaces are handled before the frame goes to the coater.
- Preservation project: favor documented compatibility and reversible decisions where historic finish matters.
- Wet or salted use: include internal cavity protection, open drain paths, and a maintenance inspection plan.
- Frame repair: complete welding, brazing, alignment, or metal replacement before final coating.
An illustrative starting policy is to move from final cleaning to the first compatible protective step within the same workday and to allow the coating to cure according to its technical sheet before assembly. That is a scheduling policy, not a universal cure time. Adjust it when humidity, temperature, coating chemistry, film thickness, or the manufacturer’s instructions indicate that the surface is not ready.
For a bicycle that will see winter roads, paint alone should not be the entire corrosion plan. Keep drain holes open, rinse salt from the frame, dry the bicycle before storage, and inspect chips around the bottom bracket and rear stays. A cavity-protection product can help in appropriate locations, but avoid applying any material where it can contaminate brake surfaces, bearing interfaces, tire contact areas, or threaded assemblies. Bay State Rust Prevention’s rust prevention undercoating service information is relevant when you are considering a broader corrosion-control plan for a vehicle or metal structure exposed to Massachusetts road salt.
Before reassembly, chase or protect threads as appropriate, verify that bearing seats are clean, and remove masking without tearing the new finish. Reinstall safety-critical components according to their manufacturer’s instructions. The U.S. Consumer Product Safety Commission maintains bicycle requirements and safety information for manufacturers and businesses at its bicycle requirements page; for an individual rebuild, also follow the component maker’s specifications and have the finished bicycle checked if alignment or braking is uncertain.
Choose professional frame restoration when the job exceeds cleaning
DIY blasting makes sense when the operator has suitable containment, respiratory protection, media control, and a frame that is straightforward to inspect. It becomes a poor trade when the frame is valuable, structurally questionable, contaminated with unknown old coatings, or part of a larger restoration involving welding and alignment.
Know what to ask before handing over the frame
- Will the shop document dents, cracks, perforation, and missing metal before coating?
- What areas will be masked, and how will threads, bearing seats, and cavities be cleaned?
- Which media and process will be used for this frame material?
- Will structural repairs happen before primer or other protection?
- How will spent abrasive and old coating debris be contained and disposed of?
- What finish is proposed, and where will it not be applied?
Ask for a decision record rather than a promise that the frame will look “like new.” A professional result should make limitations visible: a repaired dent, remaining pitting, a preserved original feature, or an area that was intentionally not blasted. That documentation matters for classic bicycles, customer-owned projects, and any frame whose future value depends on honest restoration.
For automotive repair shops and restoration businesses, the same logic applies when a bicycle frame is incidental to a larger job or when a rusted vehicle component needs specialized preparation. The useful handoff includes photographs, material identification, suspected hazards, repair requirements, and the finish that must follow. For vehicle frames and components requiring more extensive access, Bay State Rust Prevention also provides frame-off rust removal, which is a different scope from preparing a small bicycle frame but follows the same inspection-before-coating principle.
Do not let a clean appearance settle a structural question. If a frame has cracks, holes, serious pitting, bent alignment, or uncertain material, the correct next step is assessment and repair—not another blast pass and not a thicker coating.
Do this first: photograph, identify, and stop before blasting
Your first action should be to wash off loose dirt without grinding into the finish, photograph every joint and defect, identify the frame material, and remove only the components you can safely disassemble. Write down the areas that must be protected and the signs that will trigger a stop: cracks, perforation, severe pitting, distortion, unknown hazardous coating, or trapped contamination.
Then choose the least aggressive controlled process that can expose the metal for inspection. If you lack proper containment, breathing protection, media recovery, or a way to evaluate frame damage, do not improvise in a driveway. Bay State Rust Prevention can help assess rust-damaged metal, perform controlled rust removal and frame repair, and build a corrosion-protection plan; visit baystaterustprevention.com when the frame needs more than cosmetic stripping.